우리는 이전에 파이어베이스 클라우드 메세지를 통하여 iOS앱에 푸시알림을 보내봤습니다.
지난번 포스팅에 이어지는 내용입니다.
설정 또한 지난번 포스팅해서 설정한 내용을 그대로 이어나갈 예정이오니
이전의 글을 안보신 분들은 이전의 포스팅을 보고 오시는걸 추천드립니다.
[iOS] 푸시알림 클라우드 메세지 보내기[1] (APNS, 파이어베이스)
iOS에서 푸시알림 기능 사용해보겠습니다. 파이어베이스 document에서 나온 설명을 기반으로 구현해볼 예정이며 안드로이드와는 다르게 인증해야할 부분이 많이 있습니다. iOS에서 푸시 알림은 APNS
developer111.tistory.com
[iOS] 푸시알림 클라우드 메세지 보내기[2] (APNS, 파이어베이스)
이번 포스팅은 인증설정 부분입니다. 프로젝트 설정과 xcode 설정은 지난번 포스팅에서 하였으니 처음부터 따라하실 분들은 아래 포스팅을 참조해주세요. developer111.tistory.com/42 [iOS] 푸시알림 클
developer111.tistory.com
자 이제 본격적으로 스프링 서버에서 iOS앱으로 푸시알림을 보내도록 하겠습니다.
자바 서버, xcode, 애플 개발자 사이트 여러군데에서 작업을 해줘야 하기 때문에
복잡할 수가 있기 때문에 어떤 식으로 작업을 할지 개요부터 잡아 보겠습니다.
개요
- 인증서 요청을 통한 인증서 생성 및 .p12파일 생성
- 스프링 서버에서 APNs 구축
- xcode에서 알림 받는 메세지 메소드 오버라이드
자 이제 시작하겠습니다.
- 인증서 요청을 통한 인증서 생성 및 .p12파일 생성
우리는 이전에 애플 개발자 페이지의 [Account] -> [Certificates, Identifiers & Profiles] 에서
우리가 진행하는 프로젝트에 대한 Identifiers와 Profiles, Keys를 만들었습니다.
그렇기 때문에 바로 맥OS의 키체인을 열어서 CSR파일을 만들겠습니다.
키체인을 열고
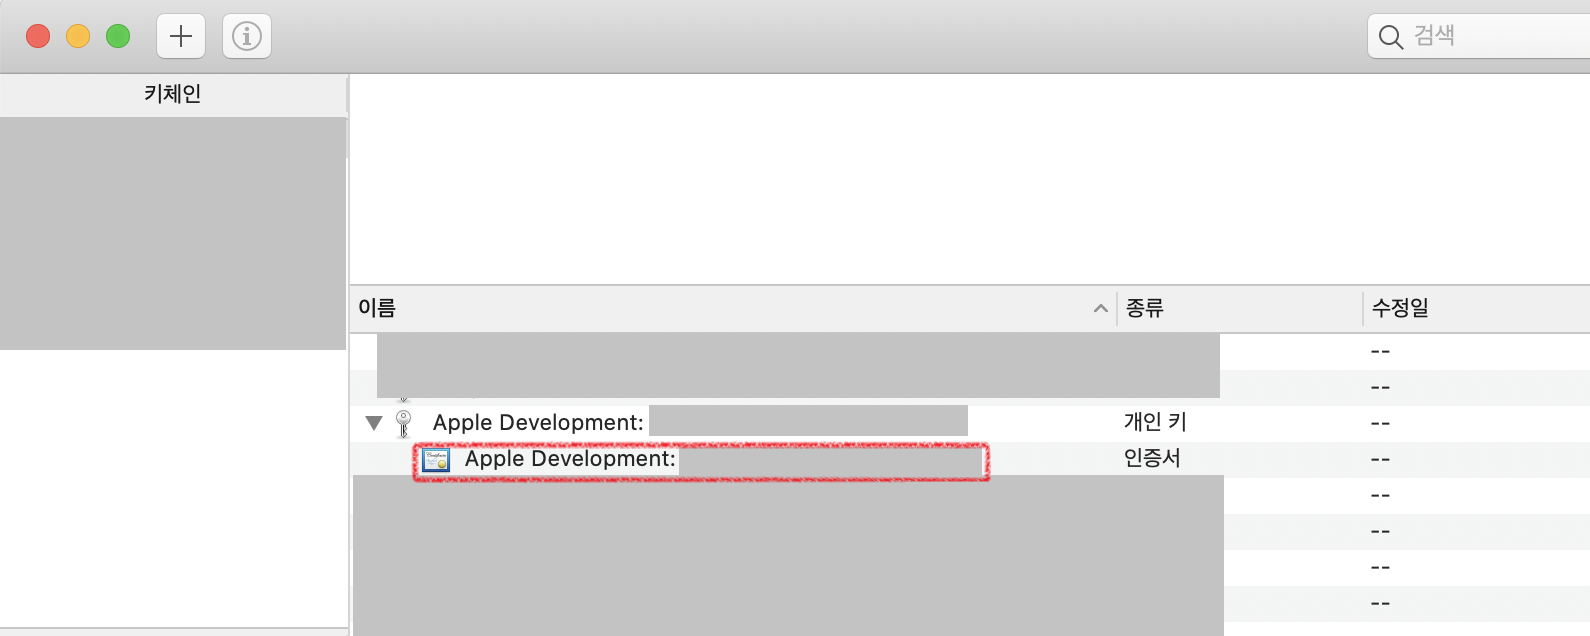
개발용으로 하실 분들은 자신의 Apple Development 인증서를 클릭하고
(배포용으로 하실 분들은 자신의 Apple Development 인증서를 클릭)
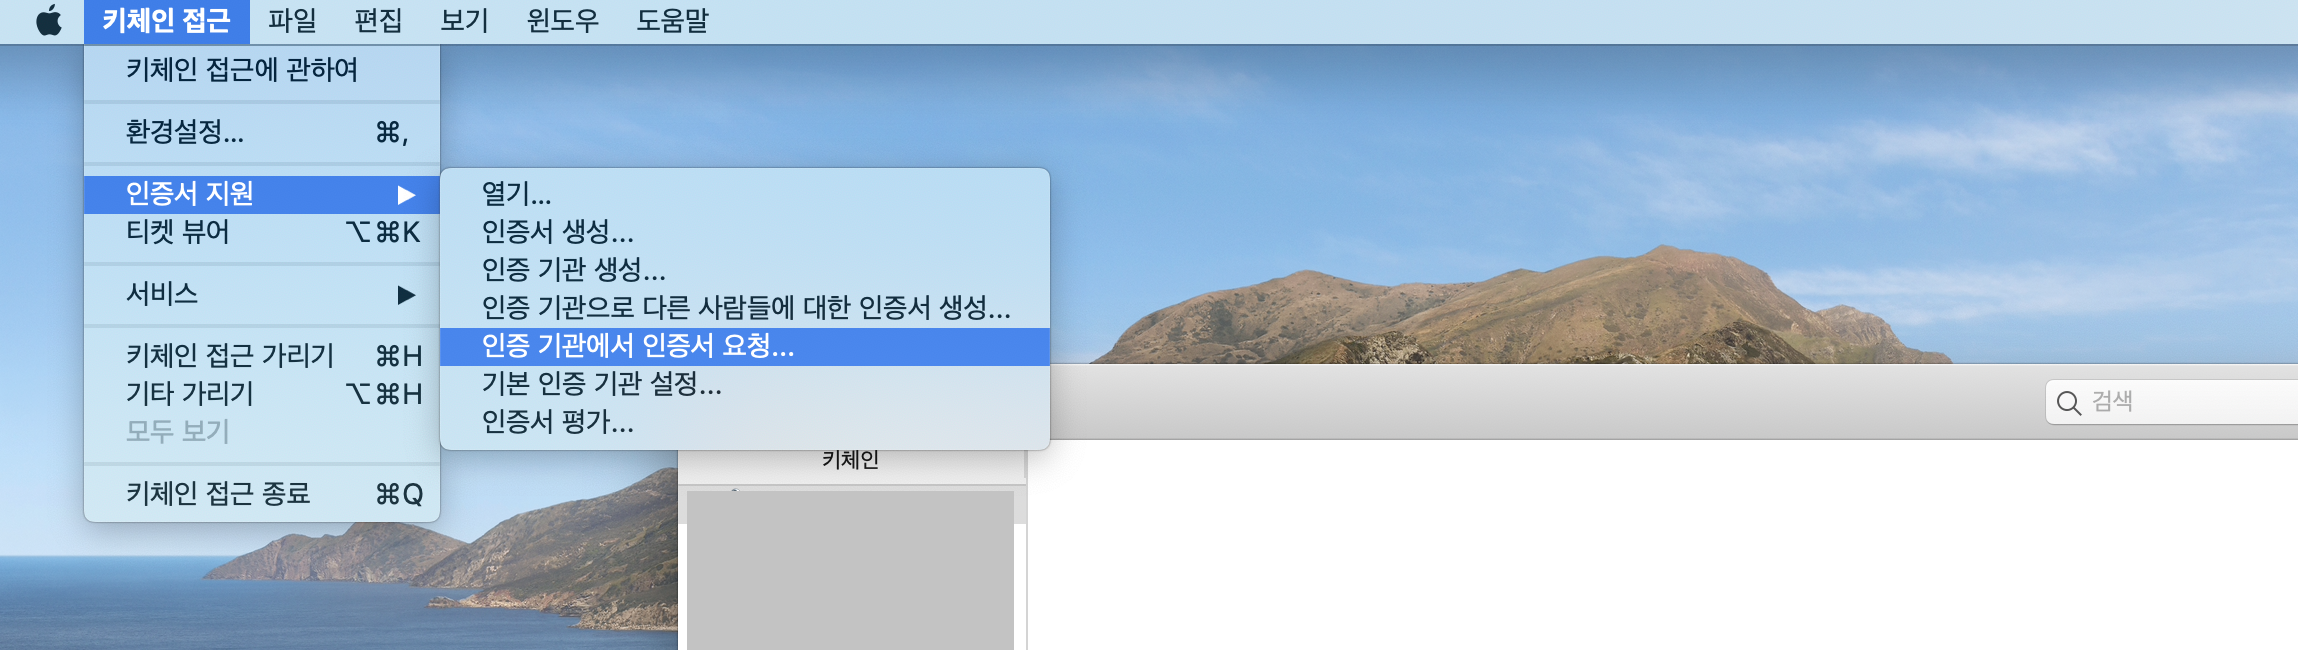
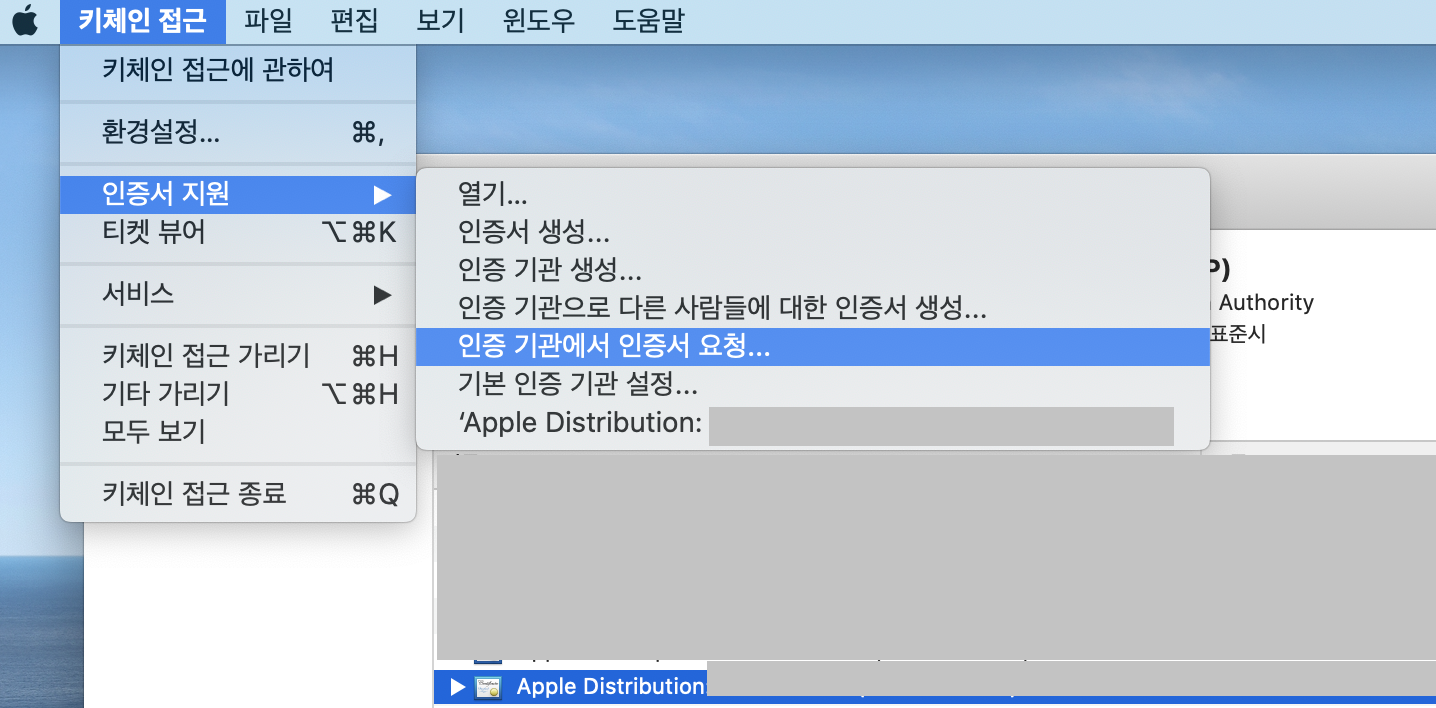
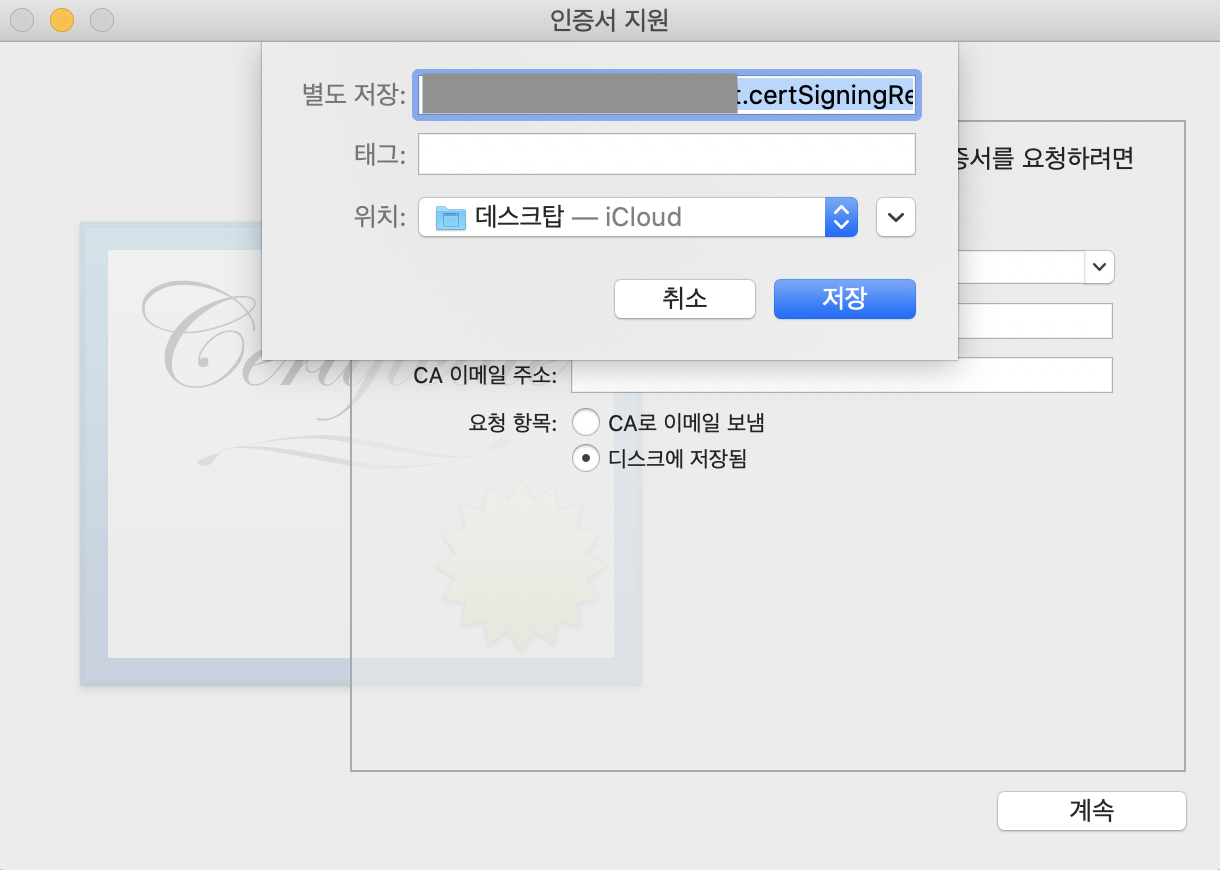
상단 메뉴의 [키체인 접근] -> [인증서 지원] -> [인증 기관에서 인증서 요청] 을 눌러주세요.
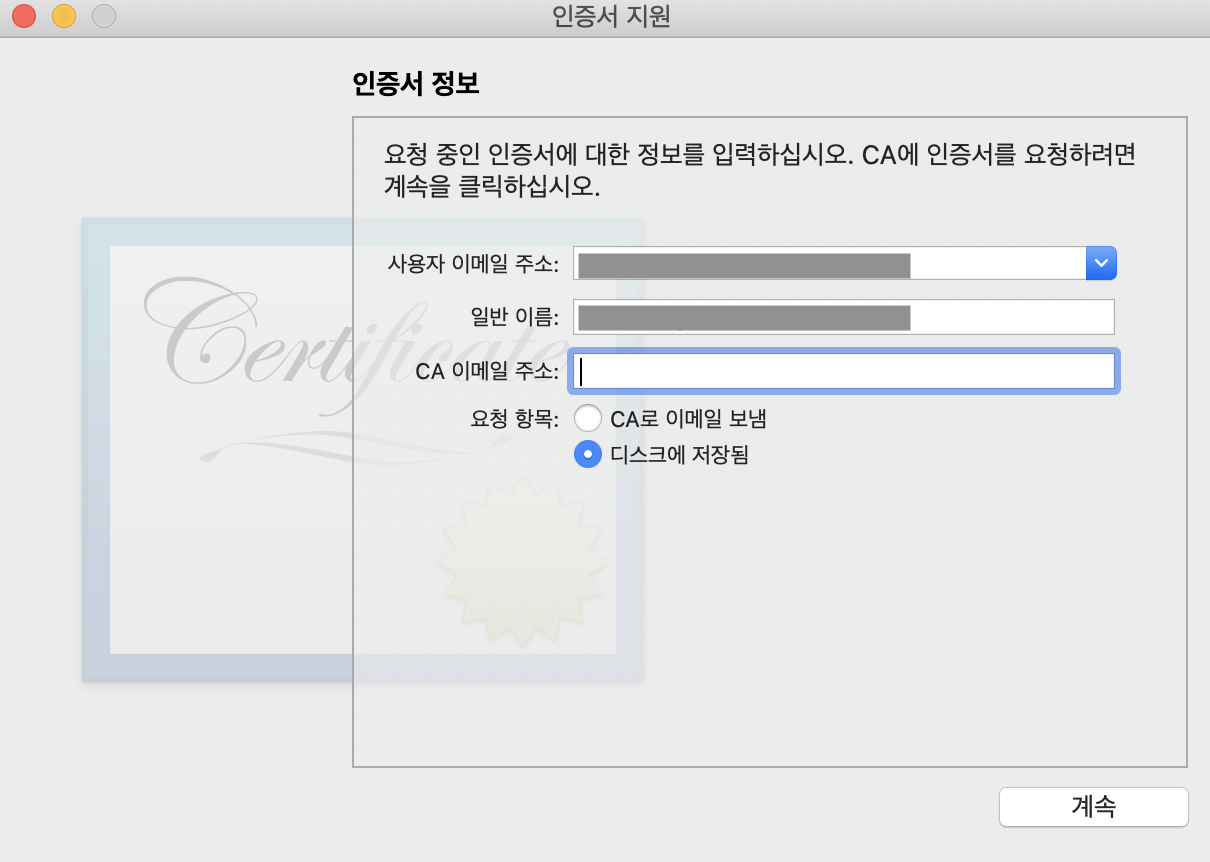
그런 다음 사용자 이메일 주소를 적고 디스크에 저장됨을 선택하고 계속해주세요.
본인이 알아볼수 있도록 저장해줍니다.
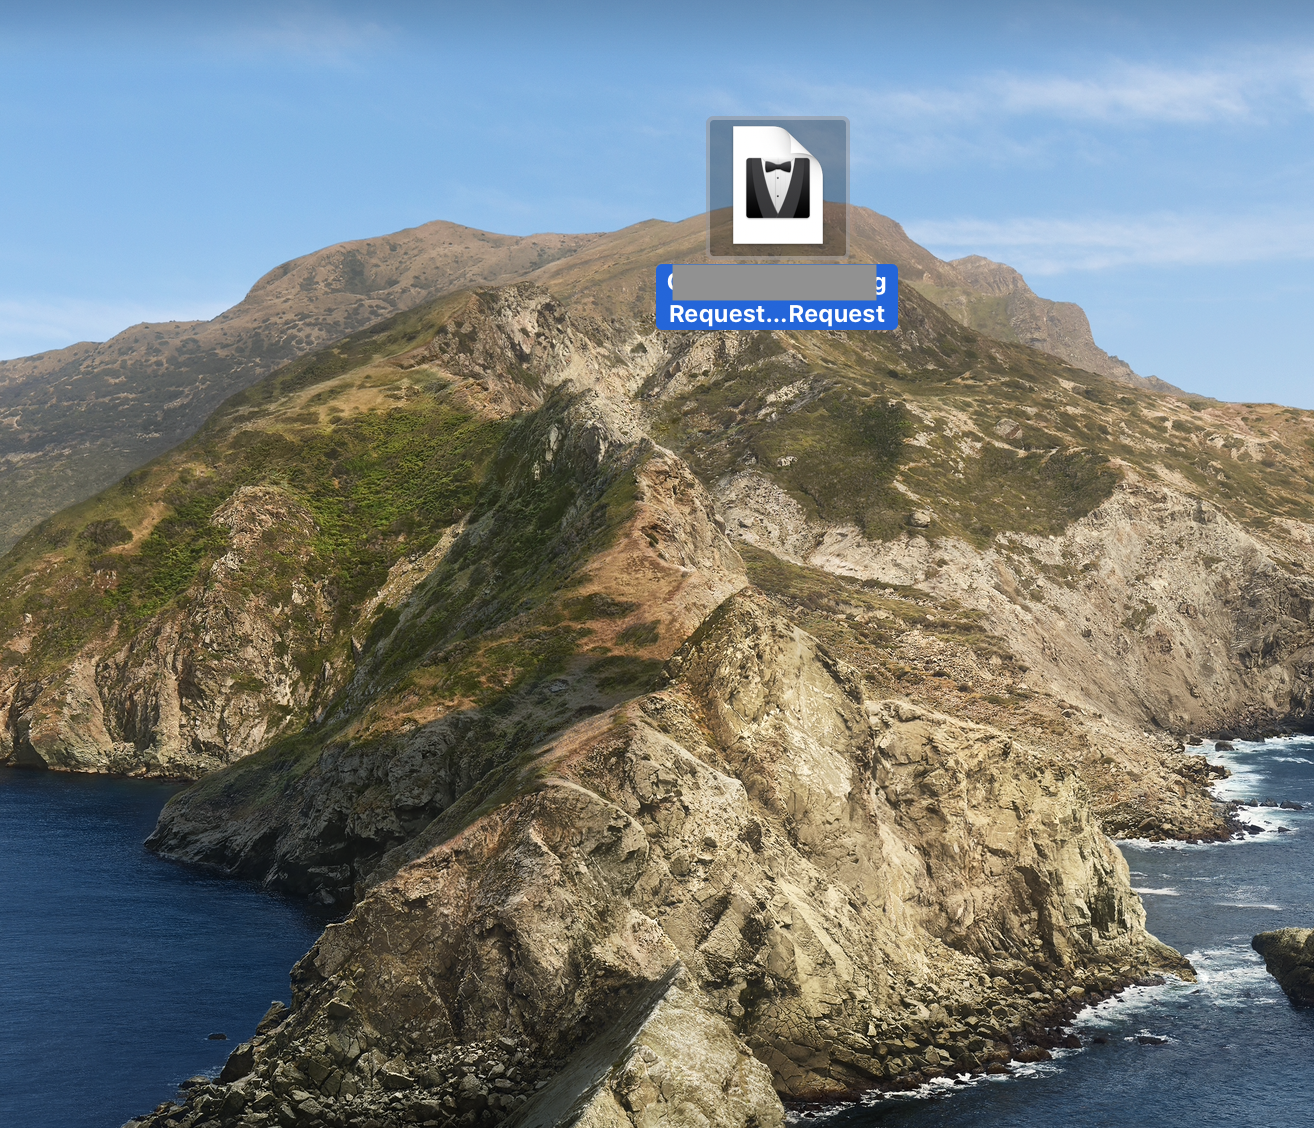
그러면 아래와 같이 csr파일이 생성됨을 확인 할 수 있습니다.

다시 애플 개발자 사이트로 접속해주시고 Certificates를 만들겠습니다.
파란색 플러스 버튼을 눌러주시고요.
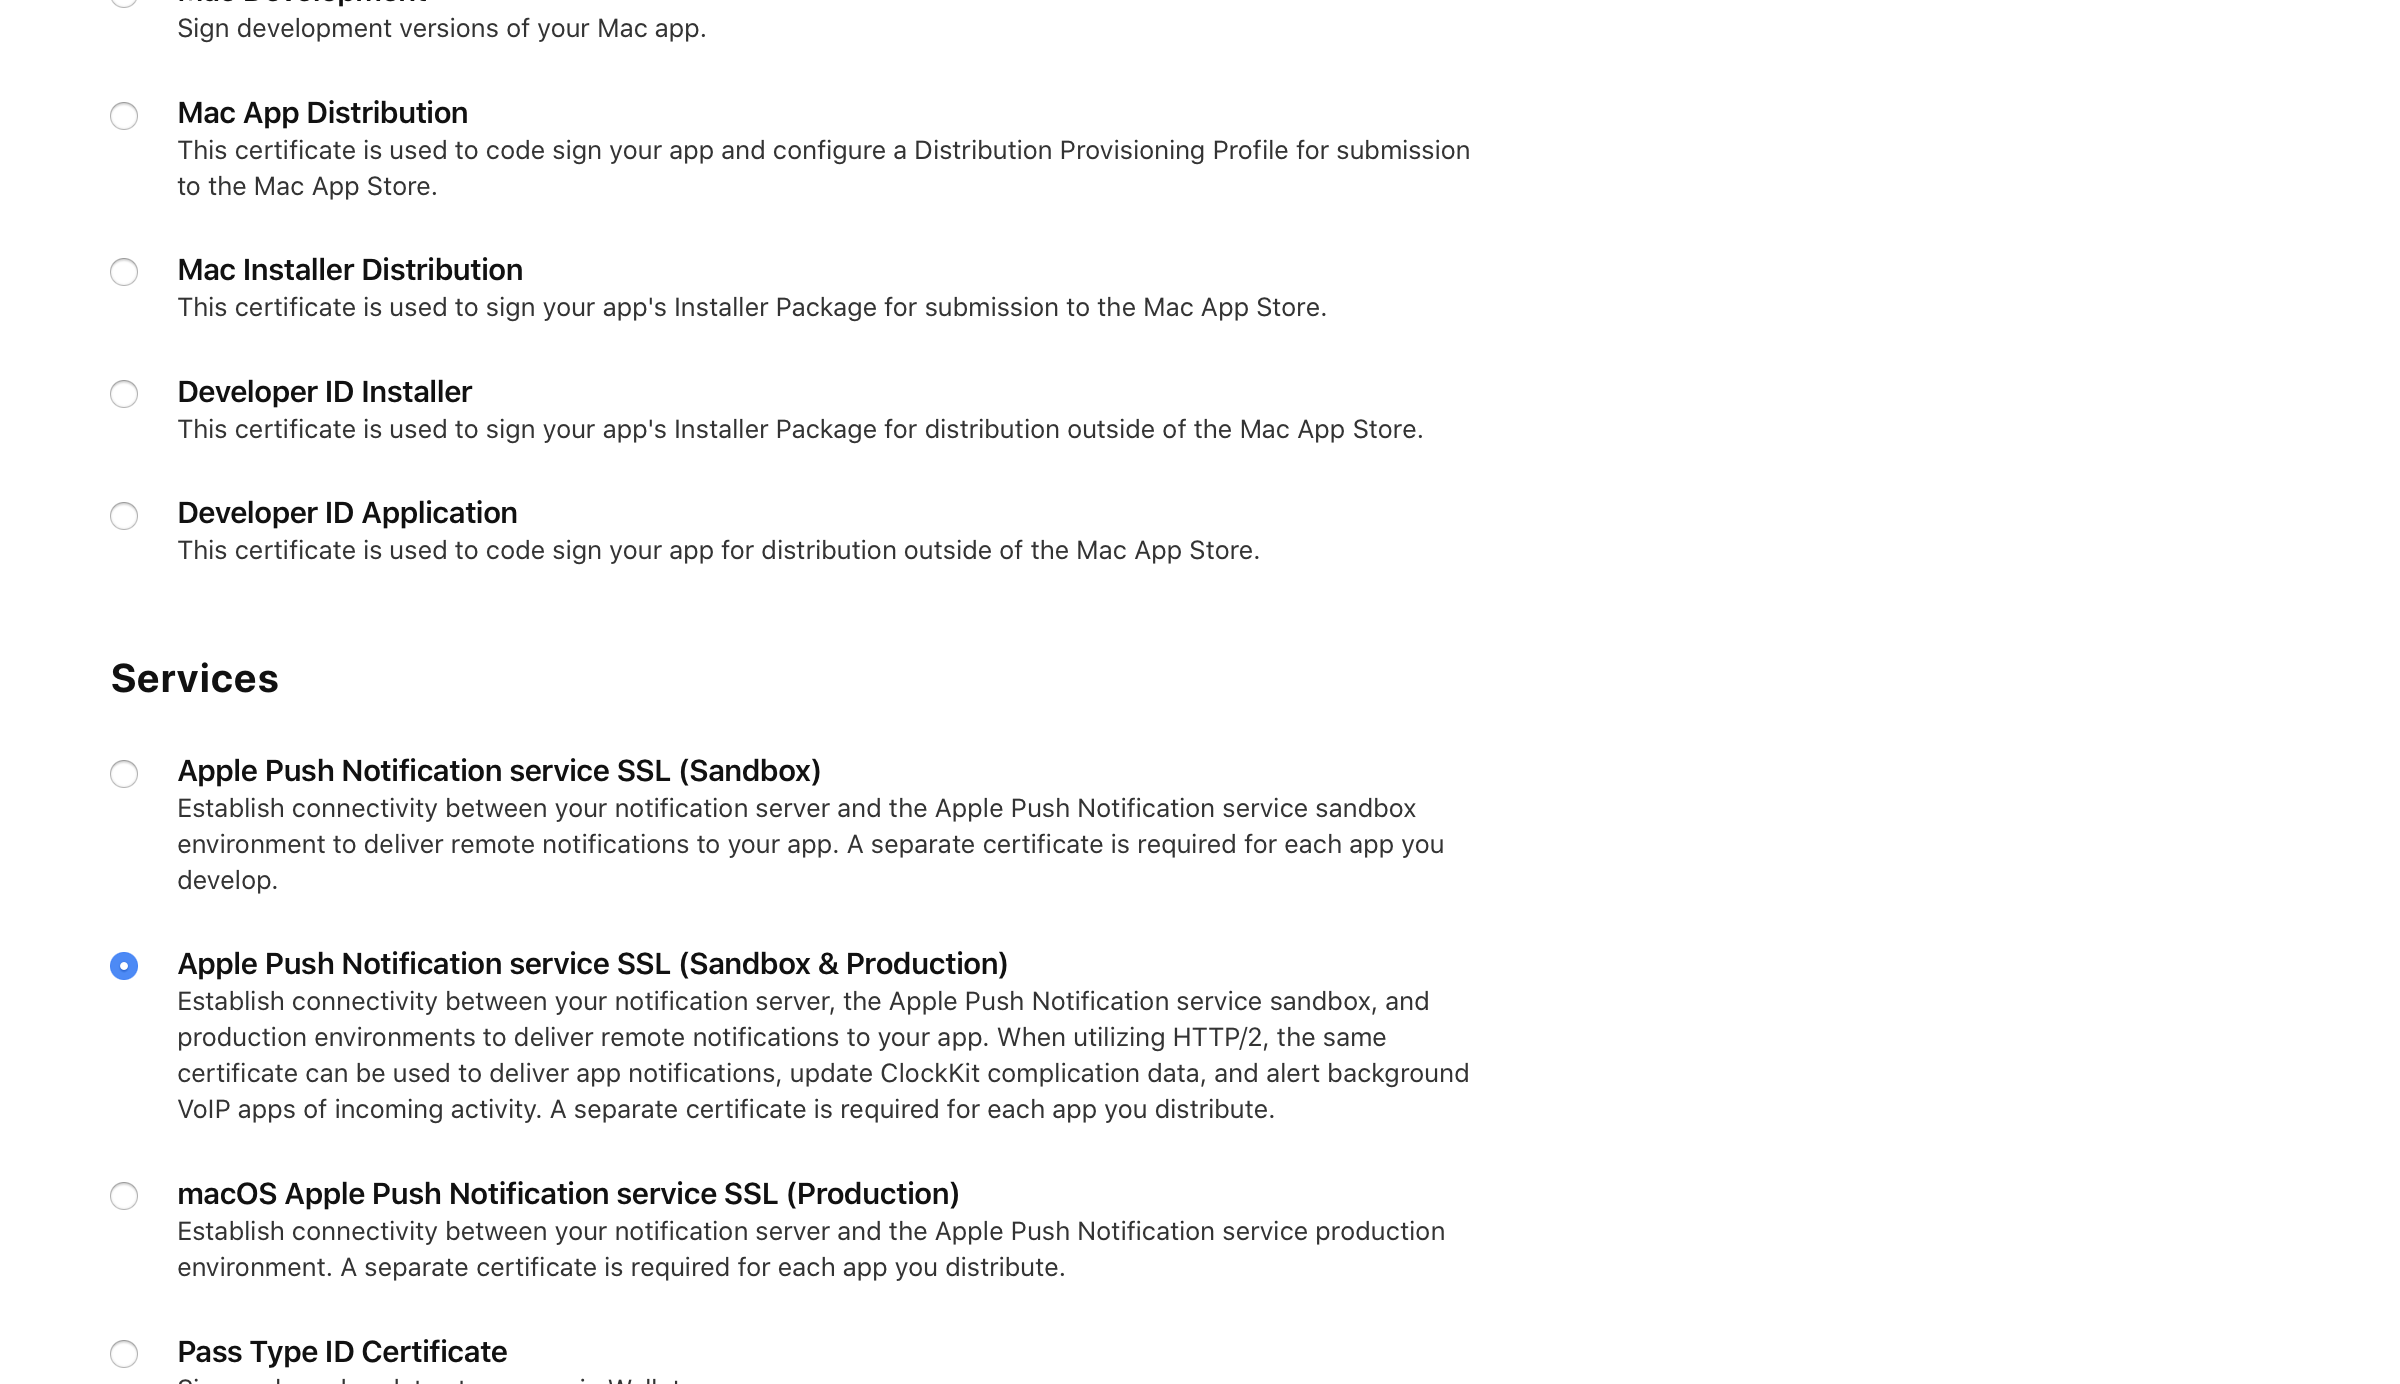
Apple Push Notifcation Service SSL(Sandbox & Production)을 선택합니다.
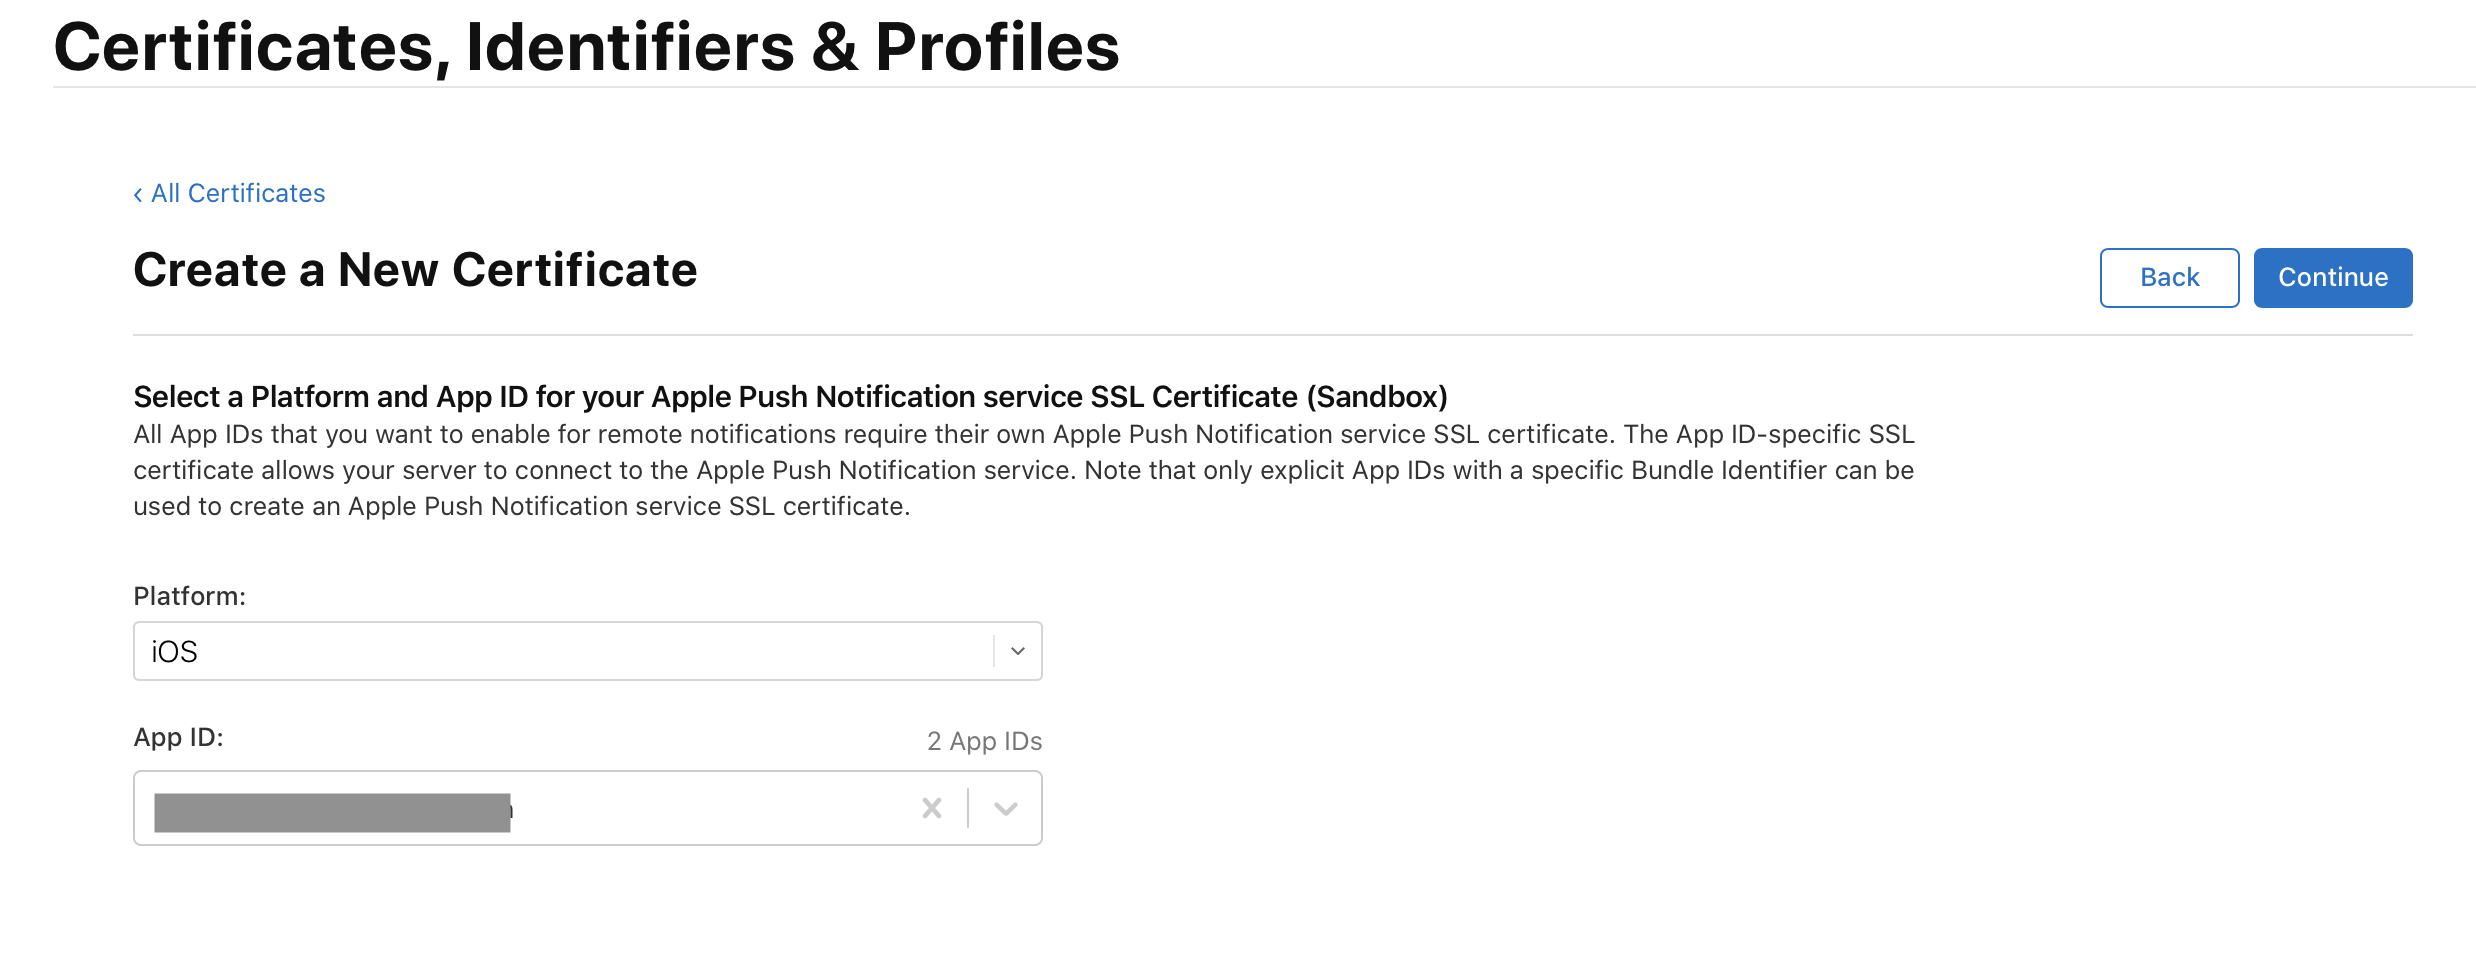
푸시알림을 진행할 앱 패키지명을 선택해주세요.
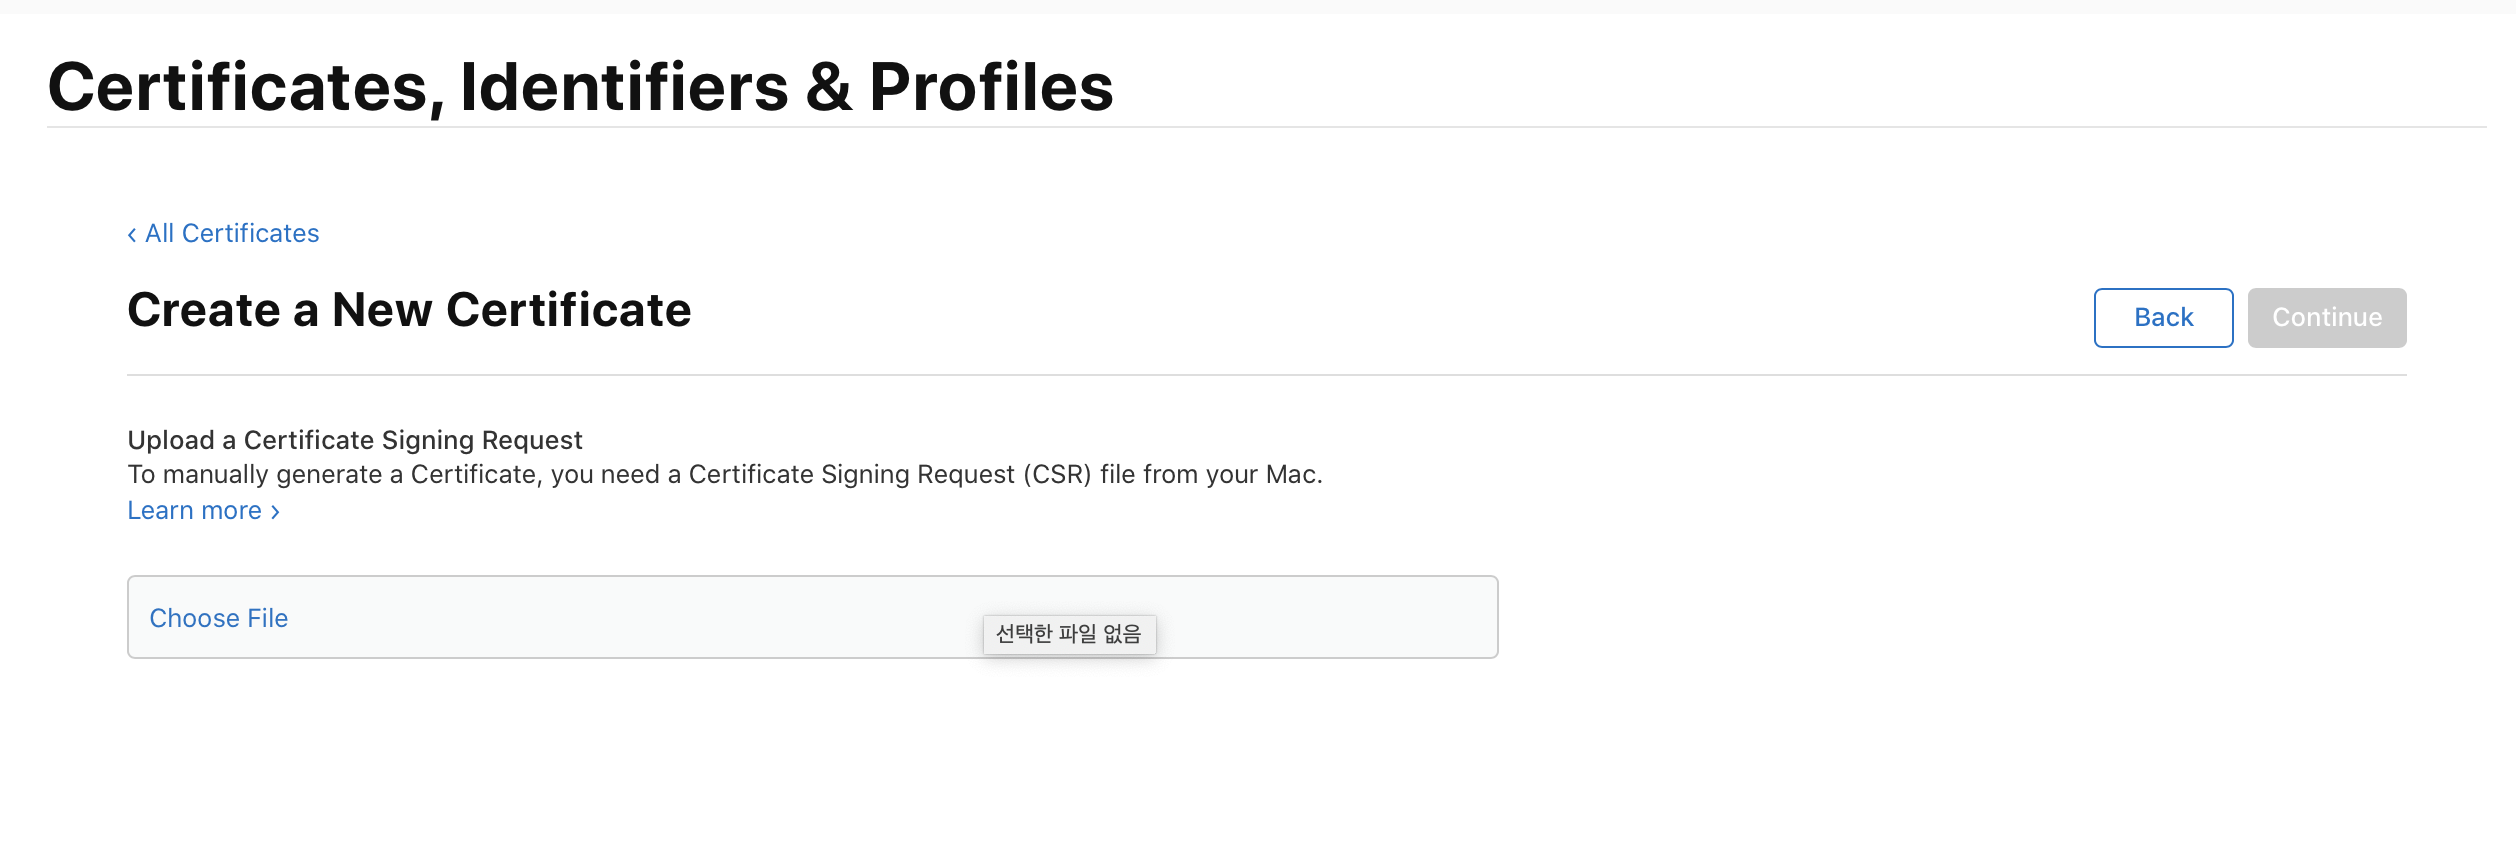
자 이렇게 하면 Choose File 페이지가 나타날텐데요.
Choose File 을 이전에 만들었던 csr파일로 선택해주세요.
그러면 이제 Certificate가 최종적으로 다 만들어지고, 다운로드 페이지가 나타날 것입니다.
다운로드 하시고 다운받은 파일을 더블클릭해주세요. 더블클릭해야 키체인에 키가 등록이 됩니다.
참고로 혹시 이전 포스팅을 그대로 따라오셨는데 배포용으로 만드시는 분은 애플 개발자 센터 가서
profile 다시 만드셔야 합니다. 방금 만든 Distribution 인증서를 기반으로 profile 다시 만드시기 바랍니다.
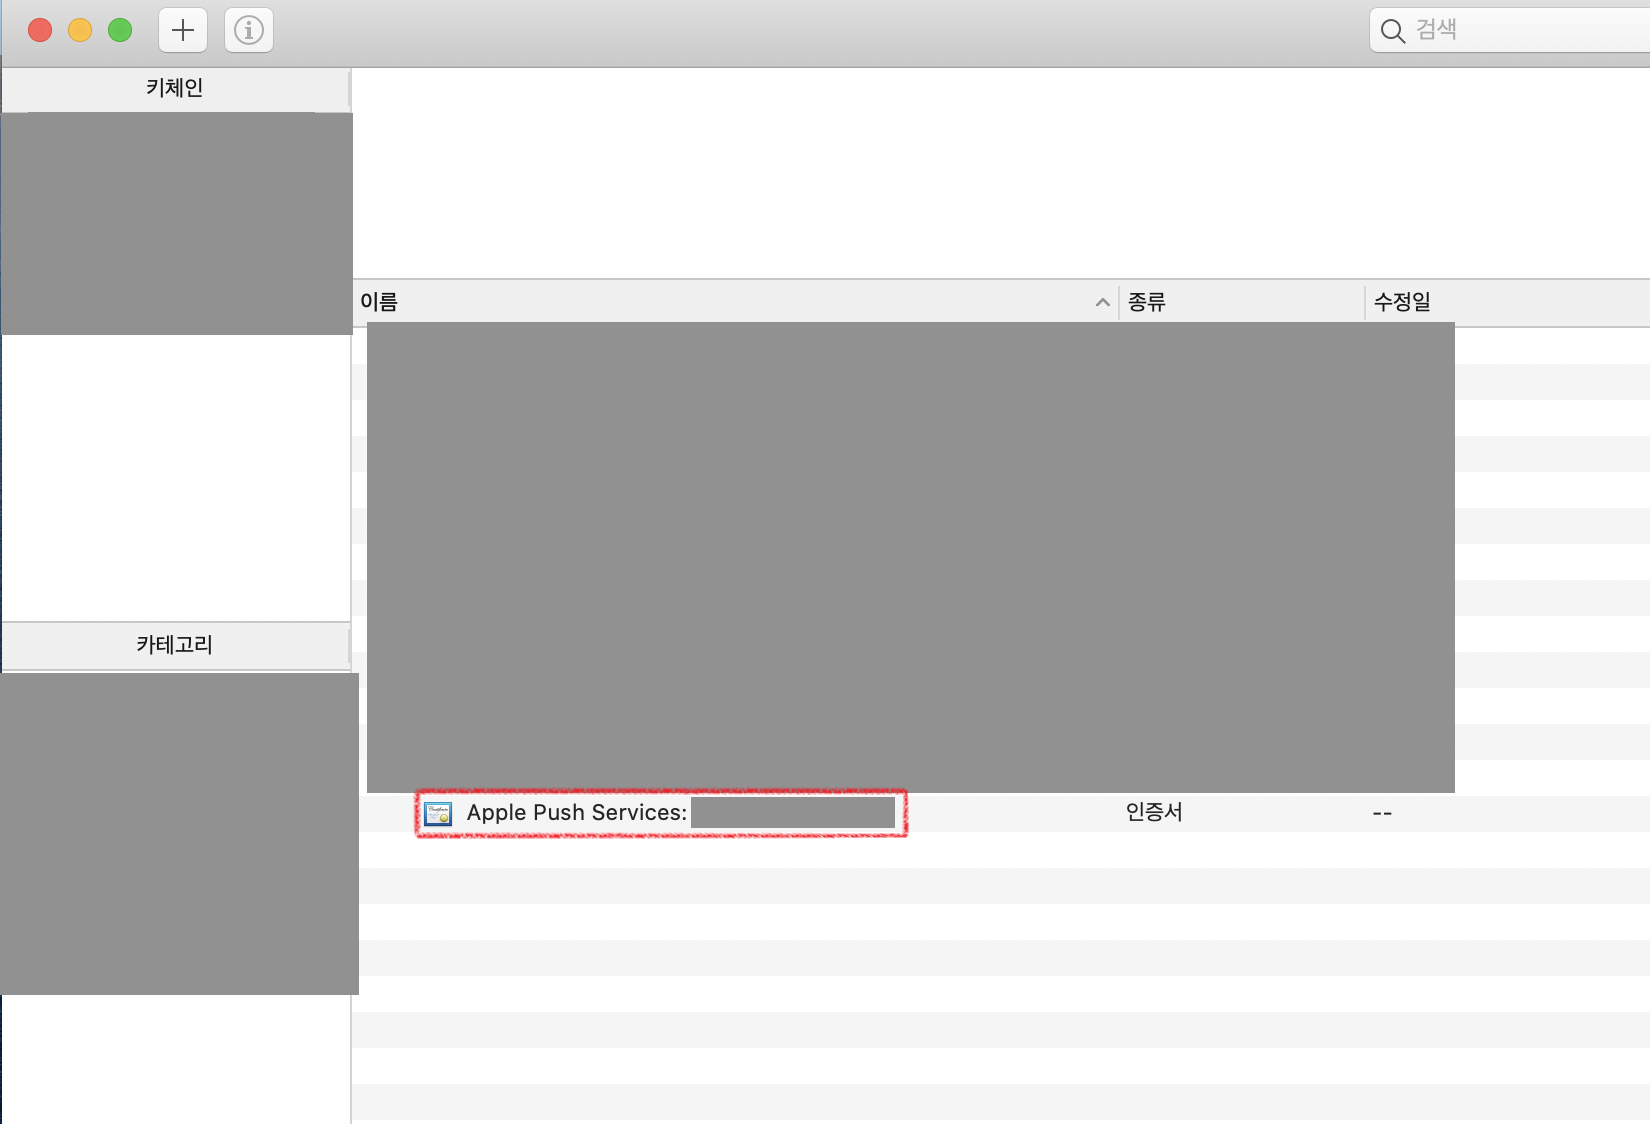
키체인 가서 확인하면 아래와 같이 Apple Push Service가 자신의 패키지 명으로 등록 되어있는것을 확인할 수 있습니다.
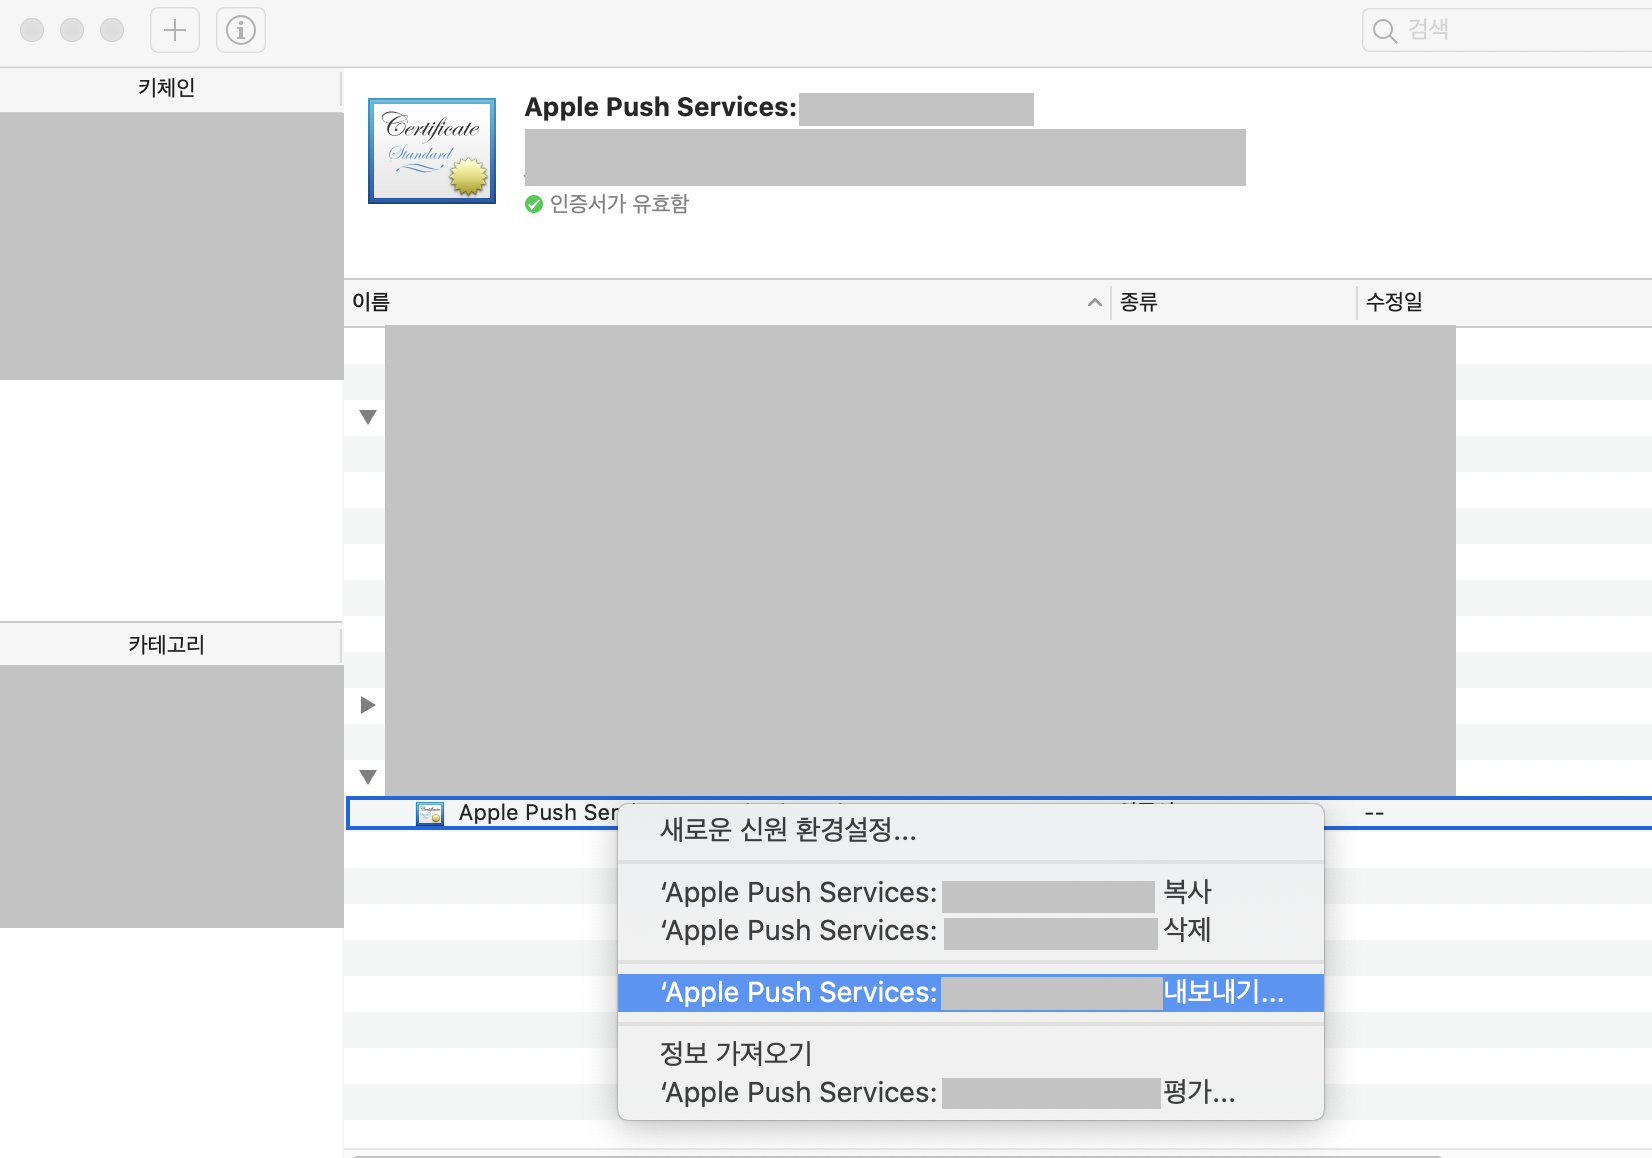
자 이제 등록된 인증서를 가지고 .p12파일을 만들겠습니다.
이 .p12파일이 스프링 웹 서버에서 인증키 역할을 하는 것입니다.
등록된 인증서 키에 마우스 우클릭을 하고
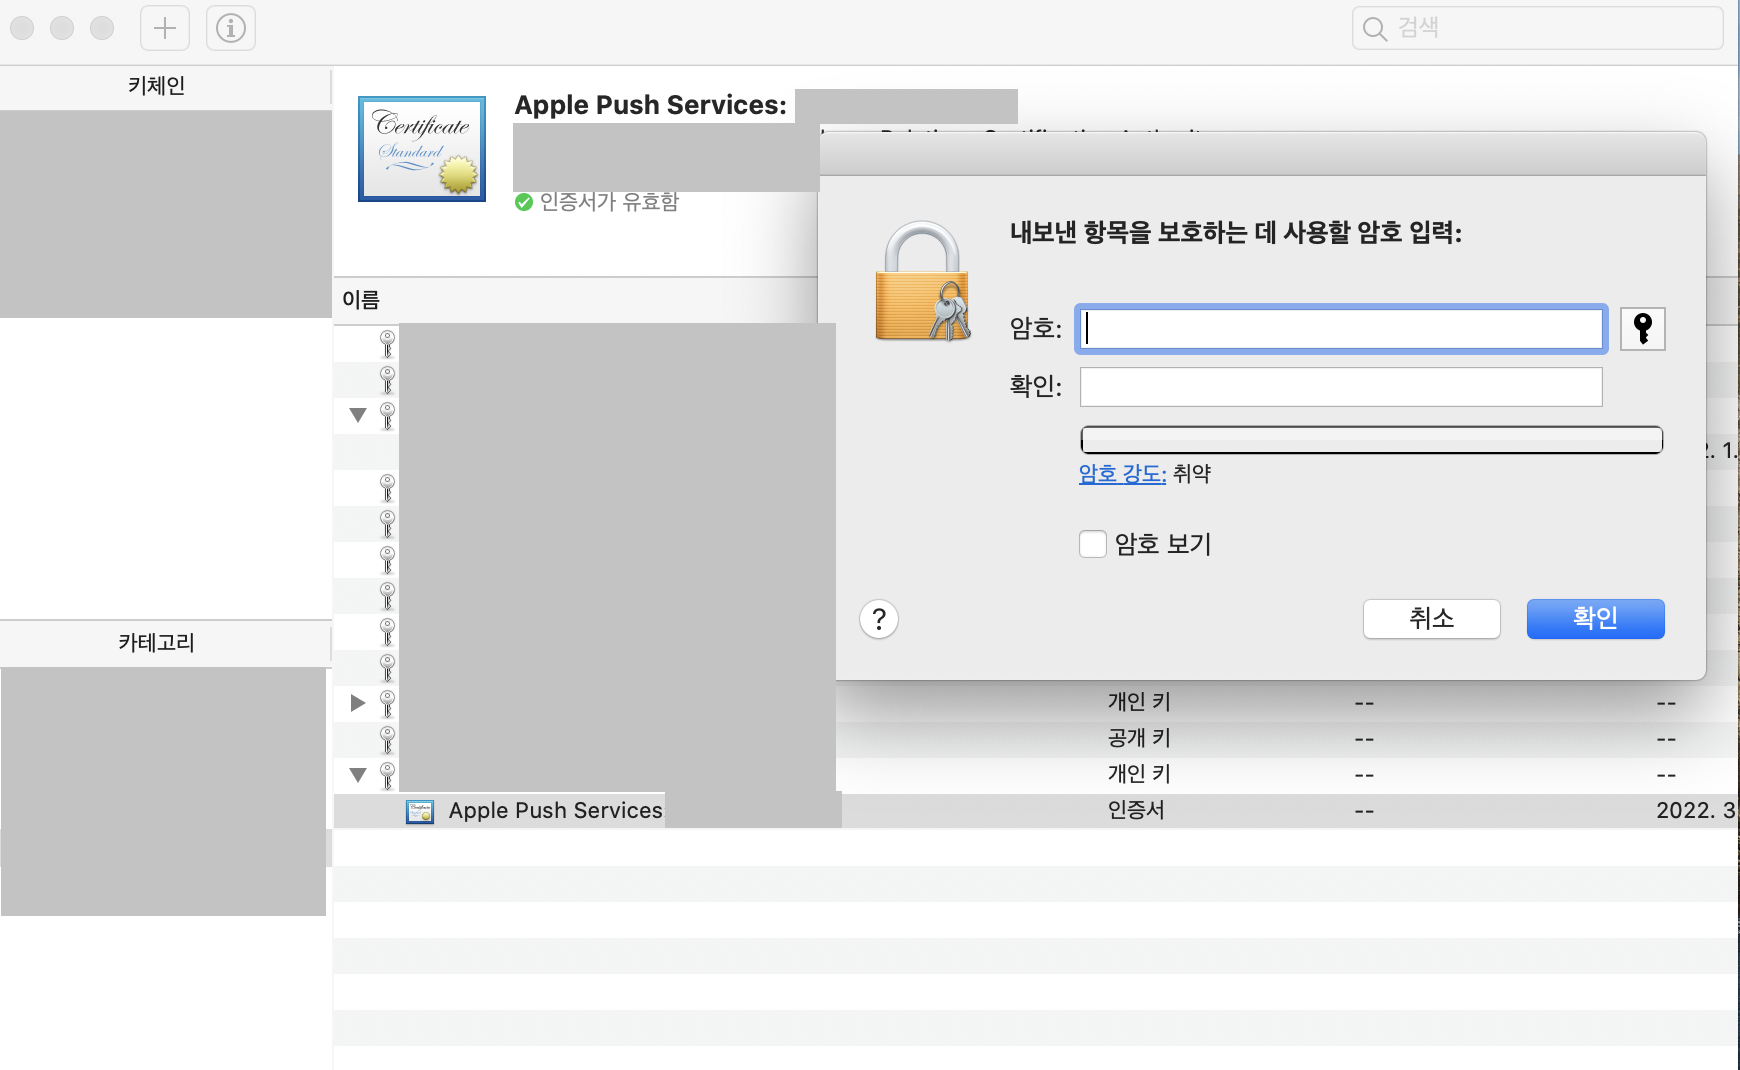
'Apple Push Services: 패키지명' 내보내기... 를 클릭합니다.
그러고나서 파일명(왠만하면 영어로)을 지정해준 다음
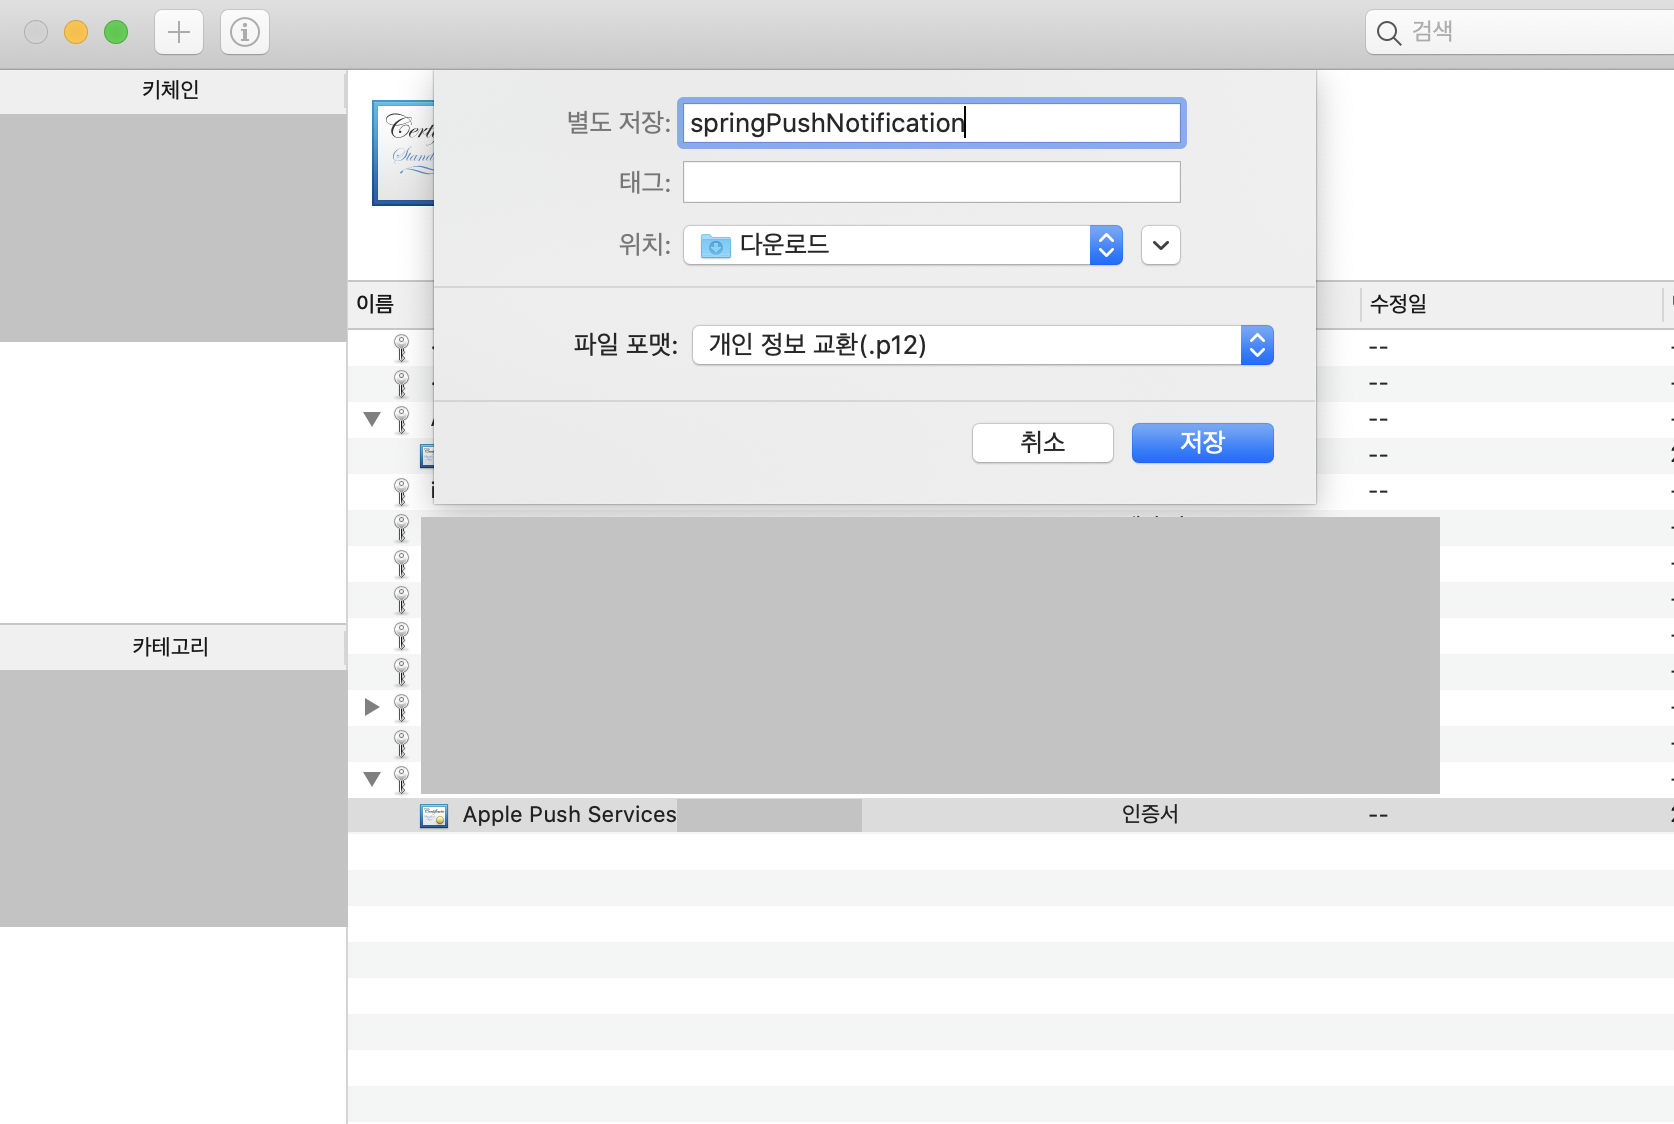
암호를 설정합니다.
암호를 기억하고 계셔야 합니다. 이 암호를 스프링 서버에서 사용합니다.
자 여기까지 하면 .p12 파일 까지 최종적으로 만들게 되었습니다.

이제 스프링 웹서버로 가보도록 하겠습니다.
스프링 서버에서 APNs 구축
첫번째 pom.xml에서 의존설정을 해주세요.
<dependency>
<groupId>com.github.fernandospr</groupId>
<artifactId>javapns-jdk16</artifactId>
<version>2.3.1</version>
</dependency>

<dependency>
<groupId>com.sun.jersey</groupId>
<artifactId>jersey-server</artifactId>
<version>1.9</version>
</dependency>

<dependency>
<groupId>javax</groupId>
<artifactId>javaee-web-api</artifactId>
<version>7.0</version>
</dependency>
그런 다음 아래의 메소드를 사용할 곳에 넣어주세요.
public static void sendApnFcmtoken(String token) {
        try {
            PushNotificationPayload payload = PushNotificationPayload.complex();
            payload.addAlert("푸시알림 테스트");
            payload.addBadge(1);
            payload.addSound("default");
            payload.addCustomDictionary("id", "1");
            System.out.println(payload.toString());
            Object obj = token;
            List < PushedNotification > NOTIFICATIONS = Push.payload(payload, "C:\\Users\\Desktop\\springPushNotification.p12", "비밀번호", false, obj);

            for (PushedNotification NOTIFICATION: NOTIFICATIONS) {
                if (NOTIFICATION.isSuccessful()) {
                    /* APPLE ACCEPTED THE NOTIFICATION AND SHOULD DELIVER IT */
                    System.out.println("PUSH NOTIFICATION SENT SUCCESSFULLY TO: " +
                        NOTIFICATION.getDevice().getToken());
                    /* STILL NEED TO QUERY THE FEEDBACK SERVICE REGULARLY */
                } else {
                    /* ADD CODE HERE TO REMOVE INVALIDTOKEN FROM YOUR DATABASE */

                    /* FIND OUT MORE ABOUT WHAT THE PROBLEM WAS */
                    Exception THEPROBLEM = NOTIFICATION.getException();
                    THEPROBLEM.printStackTrace();

                    /* IF THE PROBLEM WAS AN ERROR-RESPONSE PACKET RETURNED BY APPLE, GET IT */
                    ResponsePacket THEERRORRESPONSE = NOTIFICATION.getResponse();
                    if (THEERRORRESPONSE != null) {
                        System.out.println(THEERRORRESPONSE.getMessage());
                    }
                }
            }
        } catch (CommunicationException e) {
            // TODO Auto-generated catch block
            e.printStackTrace();
        } catch (KeystoreException e) {
            // TODO Auto-generated catch block
            e.printStackTrace();
        } catch (JSONException e) {
            // TODO Auto-generated catch block
            e.printStackTrace();
        }
    }
위 메소드에서 중요한 부분은
Object obj = token;
List < PushedNotification > NOTIFICATIONS = Push.payload(payload, "C:\\Users\\Desktop\\파일명.p12", "비밀번호", false, obj);
이 부분 입니다.
payload 메소드를 보면 .p12 파일의 경로를 적는 부분이 있고 비밀번호 그리고 파라미터로 받은 토큰이 들어가는 부분이 있습니다.
이 부분은 본인의 환경에 맞게 적어주셔야 합니다.
false라고 적힌 부분은 production여부를 묻는 것입니다. 개발용이면 true 배포용이면 false를 적으면 됩니다.
토큰은 apn 토큰을 등록해야 하는데 xcode로 넘어가서 토큰을 가져오겠습니다.
xcode에서 알림 받는 메세지 메소드 오버라이드
우리가 이전에 클라우드 메세지를 받을 수 있는 메소드를 모두 오버라이드 하였기 때문에
apn 토큰만 가져오면 웹서버에서 보내는 푸시알림을 보낼수 있습니다.
AppDelegat.swift의 didRegisterForRemoteNotificationsWithDeviceToken메소드를 아래와 같이 구현해주세요.
그리고 build 해주시면 콘솔창에 나오는 디바이스 토큰: 이 apn 토큰입니다.
func application(_ application: UIApplication,
                     didRegisterForRemoteNotificationsWithDeviceToken deviceToken: Data) {
      Messaging.messaging().apnsToken = deviceToken
        let token = deviceToken as NSData
        let token2 = token.map{String(format:"%02x",$0)}.joined()
        print("디바이스 토큰 : ", token2)
    }
이 토큰을 자바 스프링 서버에서 등록하고 테스트 하시면
푸시알림을 정상적으로 받아 볼수 있을 것입니다.
xcode AppDelegate.swift 전문
//
//  AppDelegate.swift
//

import UIKit
import Firebase
import UserNotifications

@main
class AppDelegate: UIResponder, UIApplicationDelegate, MessagingDelegate, UNUserNotificationCenterDelegate {


    func messaging(_ messaging: Messaging, didReceiveRegistrationToken fcmToken: String?) {
        Messaging.messaging().token { token, error in
          if let error = error {
            print("Error fetching FCM registration token: \(error)")
          } else if let token = token {
            print("FCM registration token: \(token)")
          }

            let dataDict:[String: String] = ["token": fcmToken ?? ""]
            NotificationCenter.default.post(name: Notification.Name("FCMToken"), object: nil, userInfo: dataDict)
        }

      print("Firebase registration token: \(String(describing: fcmToken))")

      let dataDict:[String: String] = ["token": fcmToken ?? ""]
      NotificationCenter.default.post(name: Notification.Name("FCMToken"), object: nil, userInfo: dataDict)
      // TODO: If necessary send token to application server.
      // Note: This callback is fired at each app startup and whenever a new token is generated.
    }


    func application(_ application: UIApplication, didFinishLaunchingWithOptions launchOptions: [UIApplication.LaunchOptionsKey: Any]?) -> Bool {
        // Override point for customization after application launch.
        print("willFinishLaunch 메서드 실행됨")
        FirebaseApp.configure()
        if #available(iOS 10.0, *) {
          // For iOS 10 display notification (sent via APNS)
          UNUserNotificationCenter.current().delegate = self

          let authOptions: UNAuthorizationOptions = [.alert, .badge, .sound]
          UNUserNotificationCenter.current().requestAuthorization(
            options: authOptions,
            completionHandler: {_, _ in })
        } else {
          let settings: UIUserNotificationSettings =
          UIUserNotificationSettings(types: [.alert, .badge, .sound], categories: nil)
          application.registerUserNotificationSettings(settings)
        }

        application.registerForRemoteNotifications()
        Messaging.messaging().delegate = self
        return true
    }

    // MARK: UISceneSession Lifecycle

    func application(_ application: UIApplication, configurationForConnecting connectingSceneSession: UISceneSession, options: UIScene.ConnectionOptions) -> UISceneConfiguration {
        // Called when a new scene session is being created.
        // Use this method to select a configuration to create the new scene with.
        return UISceneConfiguration(name: "Default Configuration", sessionRole: connectingSceneSession.role)
    }

    func application(_ application: UIApplication, didDiscardSceneSessions sceneSessions: Set<UISceneSession>) {
        // Called when the user discards a scene session.
        // If any sessions were discarded while the application was not running, this will be called shortly after application:didFinishLaunchingWithOptions.
        // Use this method to release any resources that were specific to the discarded scenes, as they will not return.
    }


    func application(_ application: UIApplication,
                     didRegisterForRemoteNotificationsWithDeviceToken deviceToken: Data) {
      Messaging.messaging().apnsToken = deviceToken
        let token = deviceToken as NSData
        let token2 = token.map{String(format:"%02x",$0)}.joined()
        print("디바이스 토큰 : ", token2)
    }


}
출처 :
dzone.com/articles/apns-with-java-using-javapns-library
Push Notifications With APNs With Java - DZone Mobile
This tutorial will show you how to send push notifications to a mobile iOS application using the APNs platform with Java and the Javapns notification library.
dzone.com
'기타 > 모바일' 카테고리의 다른 글
| [IOS Swift] WKWebView에서 모바일 사파리 새창으로 이동 링크 막기 (0) | 2021.02.26 |
|---|---|
| 웹뷰에서 화면 확대 축소 기능, 줌 속성 제거하기(input focus에서 화면 확대 제거) (0) | 2021.02.16 |
| [iOS] 푸시알림 클라우드 메세지 보내기[2] (APNS, 파이어베이스) (0) | 2021.02.11 |
| [iOS] 푸시알림 클라우드 메세지 보내기[1] (APNS, 파이어베이스) (0) | 2021.02.11 |
| [IOS Swift] WKWebView(웹뷰)에서 전화번호, 주소, 이메일 자동 링크 제거 (0) | 2021.02.05 |


