iOS에서 푸시알림 기능 사용해보겠습니다.
파이어베이스 document에서 나온 설명을 기반으로 구현해볼 예정이며
안드로이드와는 다르게 인증해야할 부분이 많이 있습니다.
iOS에서 푸시 알림은 APNS(Apple Push Notification Service)를 통해 이루어지며 이때 인증서와 키가 필요합니다.
파이어베이스를 사용하여도 파이어베이스가 APN인터페이스를 구현하고 있기 때문에 우리는 결국 APNS를 거쳐
푸시알림을 보내게 되는 것입니다. 따라서 파이어베이스를 사용해도 인증서와 키가 필요 합니다.
이제부터 하나씩 구현을 해보겠습니다
파이어베이스에 프로젝트 등록
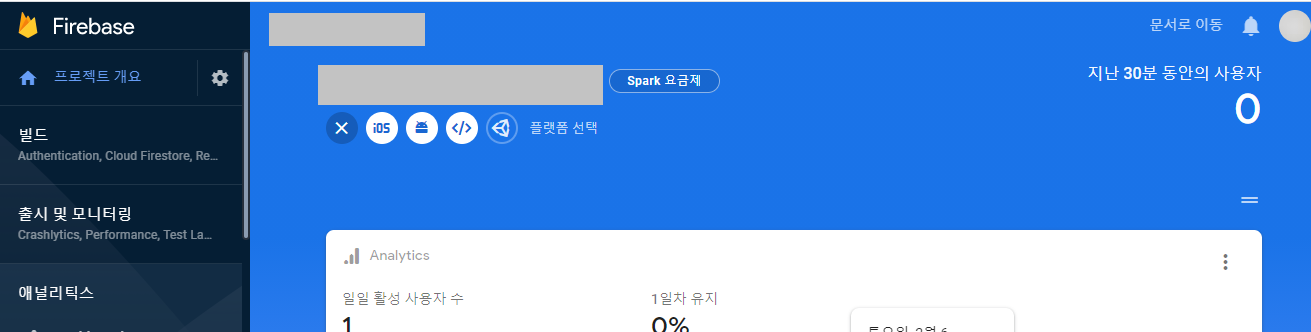
먼저 파이어베이스 콘솔에 들어가주세요.
그리고 ios용 앱을 등록하겠습니다.
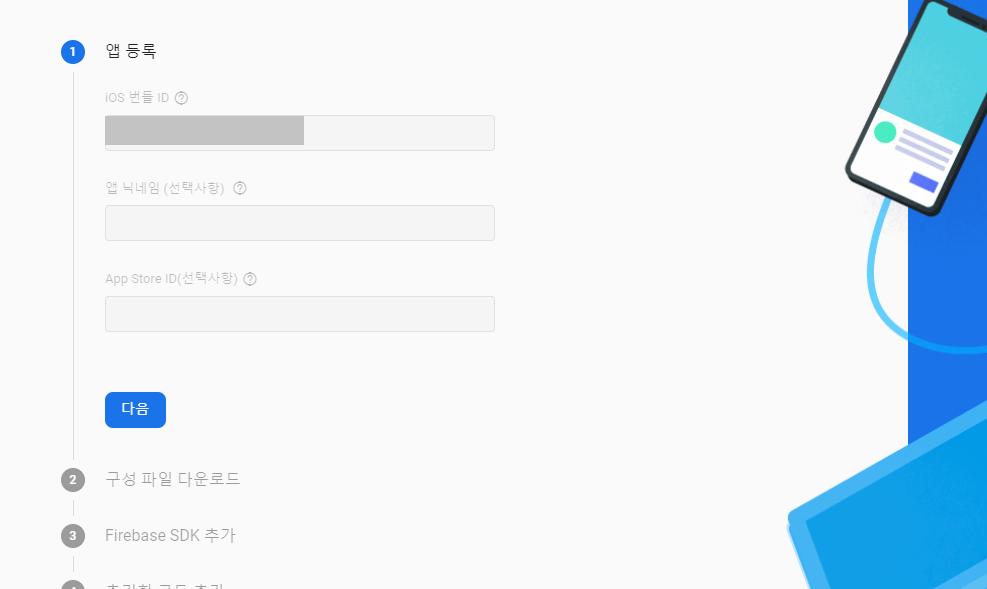
앱 번들 ID는 iOS 프로젝트의 패키지 이름입니다.
나머지는 선택사항이 비워두셔도 상관 없습니다.
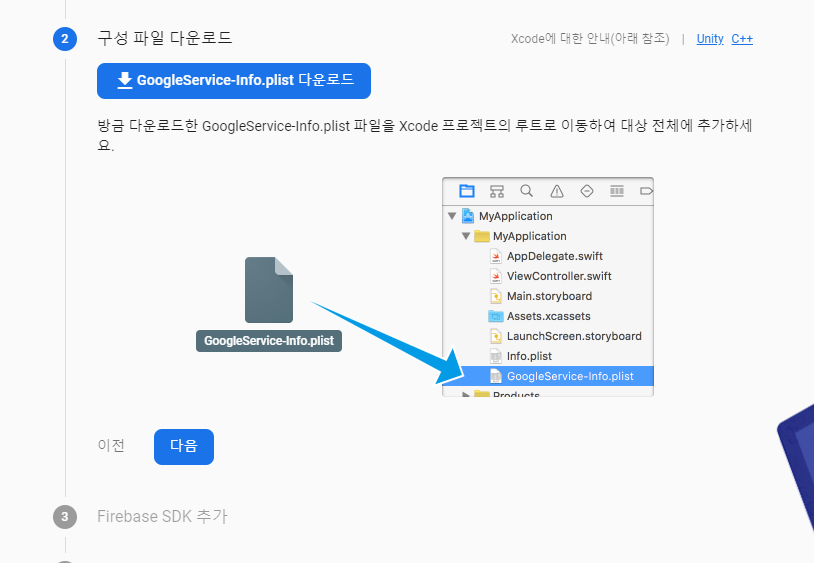
그리고 GoogleService-Info.plist파일을 프로젝트 파일 밑에 복붙해주세요.
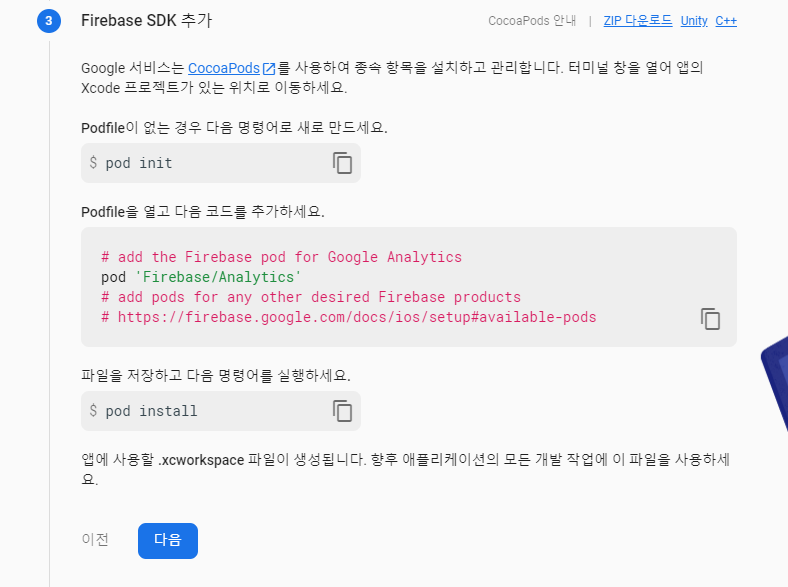
그 다음은 파이어베이스 라이브러리 모듈을 설치 하는 것인데 코코아팟을 통해 진행합니다.
코코아 팟을 처음 사용하는 분이시라면 밑에 링크를 참조해주세요.
zetal.tistory.com/entry/CocoaPod-%EC%84%A4%EC%B9%98-%EB%B0%8F-%EC%82%AC%EC%9A%A9%EB%B2%95
CocoaPod 설치 및 사용법
CocoaPod 설치 및 사용법 (https://cocoapods.org) 코코아팟은 swift나 objective-c로 개발된 오픈 라이브러리들를 내 프로젝트에 간편하게 확장시킬 수 있도록 도와주는 ios 전용 프로그램입니다. 구글 검
zetal.tistory.com
코코아팟을 설치했다면 터미널에서 자신의 앱프로젝트 경로로 이동하여 위의 pod init 명령어를 입력해주세요.
그러면 앱프로젝트 경로에 Podfile이 생겼을 것입니다. 그 파일을 열어보면
target '자신의 앱프로젝트 이름' do
#
end
위와 같은 형식으로 적혀있을텐데 target과 end 사이에
pod 'Firebase/Analytics'
pod 'Firebase/Messaging'
라고 적어주세요.
그런 다음 다시 터미널에서 pod install이라고 명령어를 실행시켜줍니다.
그렇게 되면 앱 프로젝트 폴더에 Podfile.lock과 Pods폴더, 자신의앱프로젝트명.xsworkspace 파일이 생겨있을 것입니다.
다시 파이어베이스 콘솔로 돌아오면 아래와 같은 코드를 복붙하라고 할 것입니다.
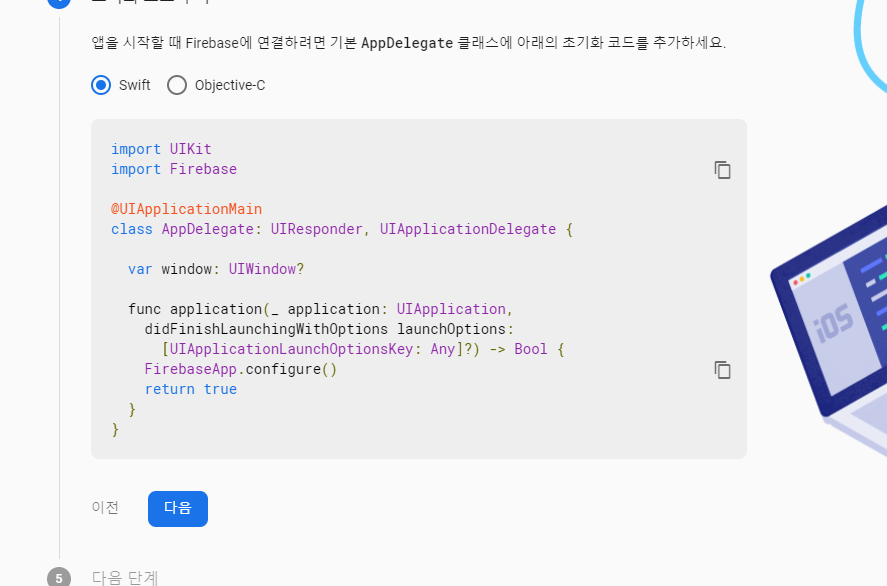
위의 코드를 AppDelegate.swift 파일에 복붙 할것인데 중요한것은 프로젝트르 열때 앱 프로젝트 경로로 들어가서
자산의앱프로젝트파일명.xcworkspace 라고 적혀 잇는 파일, 즉 확장자가 .xcworkspace라고 적힌 파일을 열어주세요.
이때 혹시 Error: Could not build Objective-C module 'Firebase' 라는 에러가 나는 분은 밑의 링크를 참조해주세요.
https://gogorchg.tistory.com/entry/iOS-Error-Could-not-build-ObjectiveC-module-Firebase
[iOS] Error: Could not build Objective-C module 'Firebase'
Push Notification 기능을 이용하기 위해 Firebase Cloud Messaging 기능을 많이 이용 할 것이다. Firebase에서 알려준 방식으로 하다가.. Firebase가 import 안되는 현상이 발생 했다. Firebase 설정 : https://..
gogorchg.tistory.com
자 이제 푸시알림을 사용하기 위해 xcode에서 각종 설정작업을 하도록 하겠습니다.
먼저 자신의 프로젝트의 info.plist에서 FirebaseAppDelegateProxyEnabled 속성을 추가하고 값을 NO로 설정해주세요.
(참고 BOOL타입으로 0으로 설정하면 됩니다.)
그런 다음 프로젝트 Signing & Capabilitis 설정으로 들어옵니다.
처음 화면은 아래와 같이 별다른 설정이 없을텐데
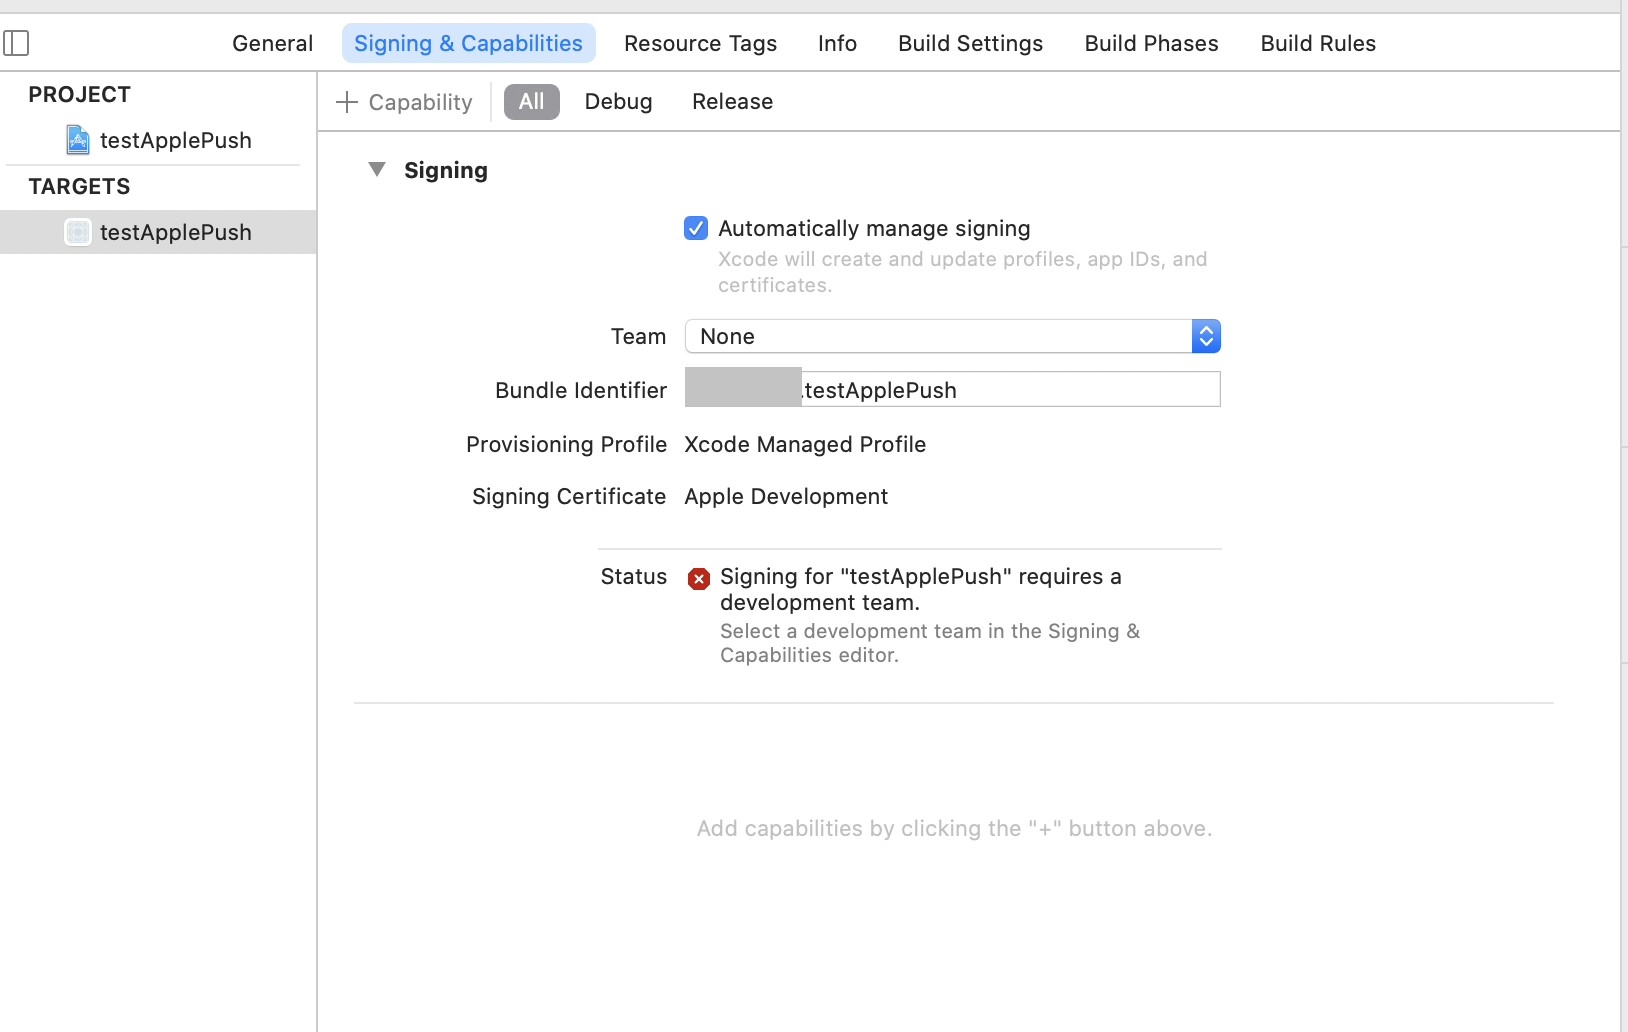
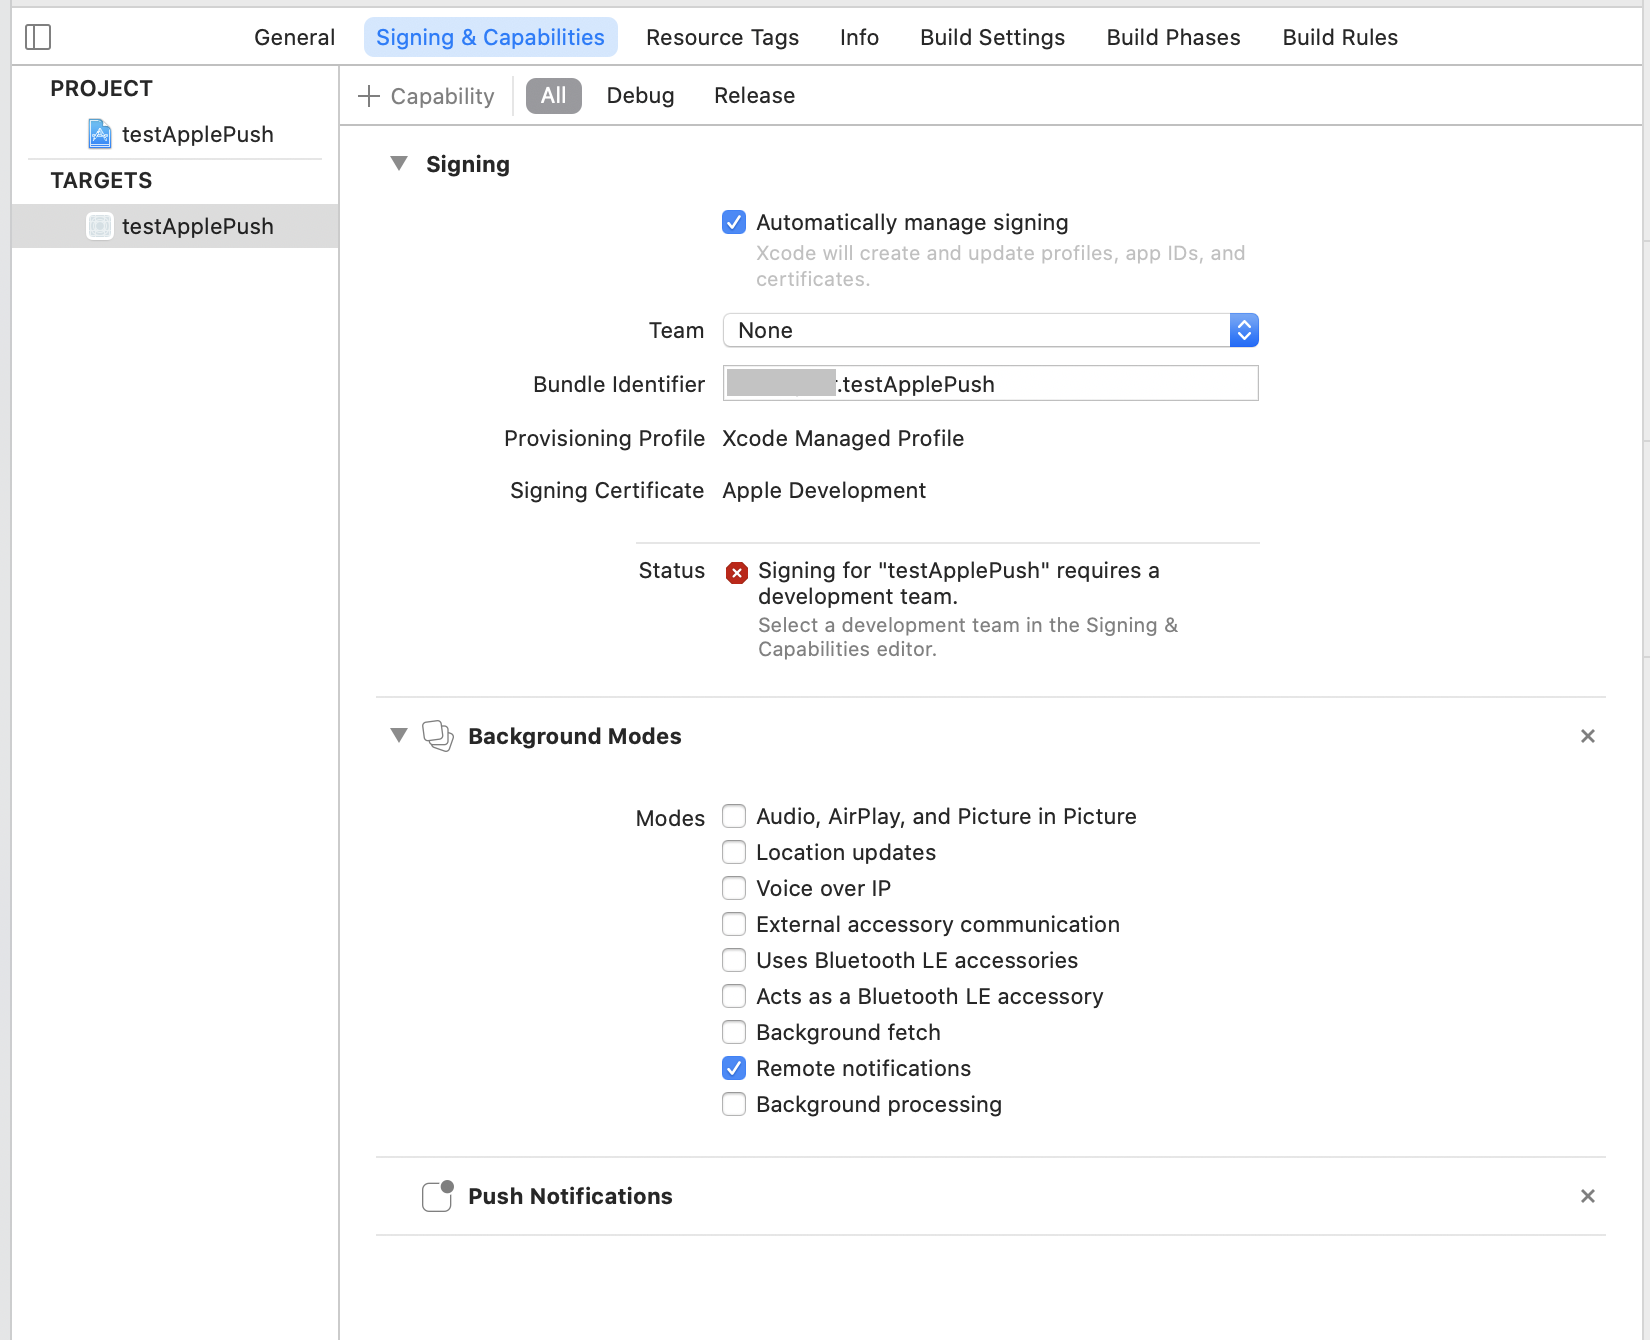
상단의 +Capability 버튼을 눌러 Background Modes를 추가하고 Remote notification을 체크해주고
PushNotification도 추가해줍니다.
그런 다음 application:didFinishLaunchingWithOptions메서드에 아래 코드를 추가 시켜주시고요.
if #available(iOS 10.0, *) {
  // For iOS 10 display notification (sent via APNS)
  UNUserNotificationCenter.current().delegate = self

  let authOptions: UNAuthorizationOptions = [.alert, .badge, .sound]
  UNUserNotificationCenter.current().requestAuthorization(
    options: authOptions,
    completionHandler: {_, _ in })
} else {
  let settings: UIUserNotificationSettings =
  UIUserNotificationSettings(types: [.alert, .badge, .sound], categories: nil)
  application.registerUserNotificationSettings(settings)
}

application.registerForRemoteNotifications()

Messaging.messaging().delegate = self

Messaging.messaging().token { token, error in
  if let error = error {
    print("Error fetching FCM registration token: \(error)")
  } else if let token = token {
    print("FCM registration token: \(token)")

  }
}
그리고 아래 메서드들을 추가시켜주세요.
func messaging(_ messaging: Messaging, didReceiveRegistrationToken fcmToken: String?) {
  print("Firebase registration token: \(String(describing: fcmToken))")

  let dataDict:[String: String] = ["token": fcmToken ?? ""]
  NotificationCenter.default.post(name: Notification.Name("FCMToken"), object: nil, userInfo: dataDict)
  // TODO: If necessary send token to application server.
  // Note: This callback is fired at each app startup and whenever a new token is generated.
}
밑에 메소드는 파이어베이스 도큐멘트에 나온것과 살짝 다릅니다.
저는 이렇게 설정해야 돌아갔는데, 사용자 환경에 따라 다를수 있으니 파이어베이스 도큐멘트에 나와 있는 메소드로
사용해보고 안되면 밑에 제가 설정해놓은 메소드로 사용해보세요.
func application(_ application: UIApplication,
                 didRegisterForRemoteNotificationsWithDeviceToken deviceToken: Data) {
  Messaging.messaging().apnsToken = deviceToken
}
AppDelegate.swift 코드 전문
import UIKit
import Firebase
import UserNotifications


@main
class AppDelegate: UIResponder, UIApplicationDelegate, MessagingDelegate, UNUserNotificationCenterDelegate {

func application(_ application: UIApplication, didFinishLaunchingWithOptions launchOptions: [UIApplication.LaunchOptionsKey: Any]?) -> Bool {
// Override point for customization after application launch.
print("willFinishLaunch 메서드 실행됨")
FirebaseApp.configure()
if #available(iOS 10.0, *) {
// For iOS 10 display notification (sent via APNS)
UNUserNotificationCenter.current().delegate = self

let authOptions: UNAuthorizationOptions = [.alert, .badge, .sound]
UNUserNotificationCenter.current().requestAuthorization(
options: authOptions,
completionHandler: {_, _ in })
} else {
let settings: UIUserNotificationSettings =
UIUserNotificationSettings(types: [.alert, .badge, .sound], categories: nil)
application.registerUserNotificationSettings(settings)
}

application.registerForRemoteNotifications()
Messaging.messaging().delegate = self

Messaging.messaging().token { token, error in
if let error = error {
print("Error fetching FCM registration token: \(error)")
} else if let token = token {
print("FCM registration token: \(token)")

}
}
return true
}

// MARK: UISceneSession Lifecycle

func application(_ application: UIApplication, configurationForConnecting connectingSceneSession: UISceneSession, options: UIScene.ConnectionOptions) -> UISceneConfiguration {
// Called when a new scene session is being created.
// Use this method to select a configuration to create the new scene with.
return UISceneConfiguration(name: "Default Configuration", sessionRole: connectingSceneSession.role)
}

func application(_ application: UIApplication, didDiscardSceneSessions sceneSessions: Set) {
// Called when the user discards a scene session.
// If any sessions were discarded while the application was not running, this will be called shortly after application:didFinishLaunchingWithOptions.
// Use this method to release any resources that were specific to the discarded scenes, as they will not return.
}


func application(_ application: UIApplication,
didRegisterForRemoteNotificationsWithDeviceToken deviceToken: Data) {
Messaging.messaging().apnsToken = deviceToken
}

func messaging(_ messaging: Messaging, didReceiveRegistrationToken fcmToken: String?) {
print("Firebase registration token: \(String(describing: fcmToken))")

let dataDict:[String: String] = ["token": fcmToken ?? ""]
NotificationCenter.default.post(name: Notification.Name("FCMToken"), object: nil, userInfo: dataDict)
// TODO: If necessary send token to application server.
// Note: This callback is fired at each app startup and whenever a new token is generated.
}
}
자 이제 인증설정을 해야하는데요. 글이 길어지는 관계로 아래 포스팅에서 계속 하겠습니다.
[iOS] 푸시알림 클라우드 메세지 보내기[2] (APNS, 파이어베이스)
애플 인증 설정 developer.apple.com/ Apple Developer There’s never been a better time to develop for Apple platforms. developer.apple.com -Idetifier 설정 애플 개발자 페이지의 account 페이지로 들어오..
developer111.tistory.com
출처:
firebase.google.com/docs/cloud-messaging/ios/client?hl=ko
iOS에서 Firebase 클라우드 메시징 클라이언트 앱 설정
iOS 클라이언트 앱의 경우 Firebase 클라우드 메시징 APN 인터페이스를 통해 최대 4KB의 알림 및 데이터 페이로드를 수신할 수 있습니다. Objective-C 또는 Swift로 클라이언트 코드를 작성하려면 FI
firebase.google.com
m.blog.naver.com/dbrwhdqja/221331687954
FCM 푸시 알림 iOS 앱 가이드
구글 파이어베이스는 공식적으로 안드로이드와 iOS 양대 운영체제를 지원하고 있다.iOS 디바이스에 대...
blog.naver.com
'모바일' 카테고리의 다른 글
| [ios] 자바 스프링 서버에서 iOS앱에 푸시 알림 보내기(APNs 개발용, 배포용) (2) | 2021.02.12 |
|---|---|
| [iOS] 푸시알림 클라우드 메세지 보내기[2] (APNS, 파이어베이스) (0) | 2021.02.11 |
| [IOS Swift] WKWebView(웹뷰)에서 전화번호, 주소, 이메일 자동 링크 제거 (0) | 2021.02.05 |
| [IOS]스위프트 웹뷰 자바스크립트 경고창 설정 (0) | 2021.01.27 |
| [Swift] WKWebView, ios 웹뷰와 모바일 웹 구분 (0) | 2021.01.24 |


